Manual events can be added for a variety of reasons. The more information you add the less questions your guests will have.
Table of Contents
Summary Version
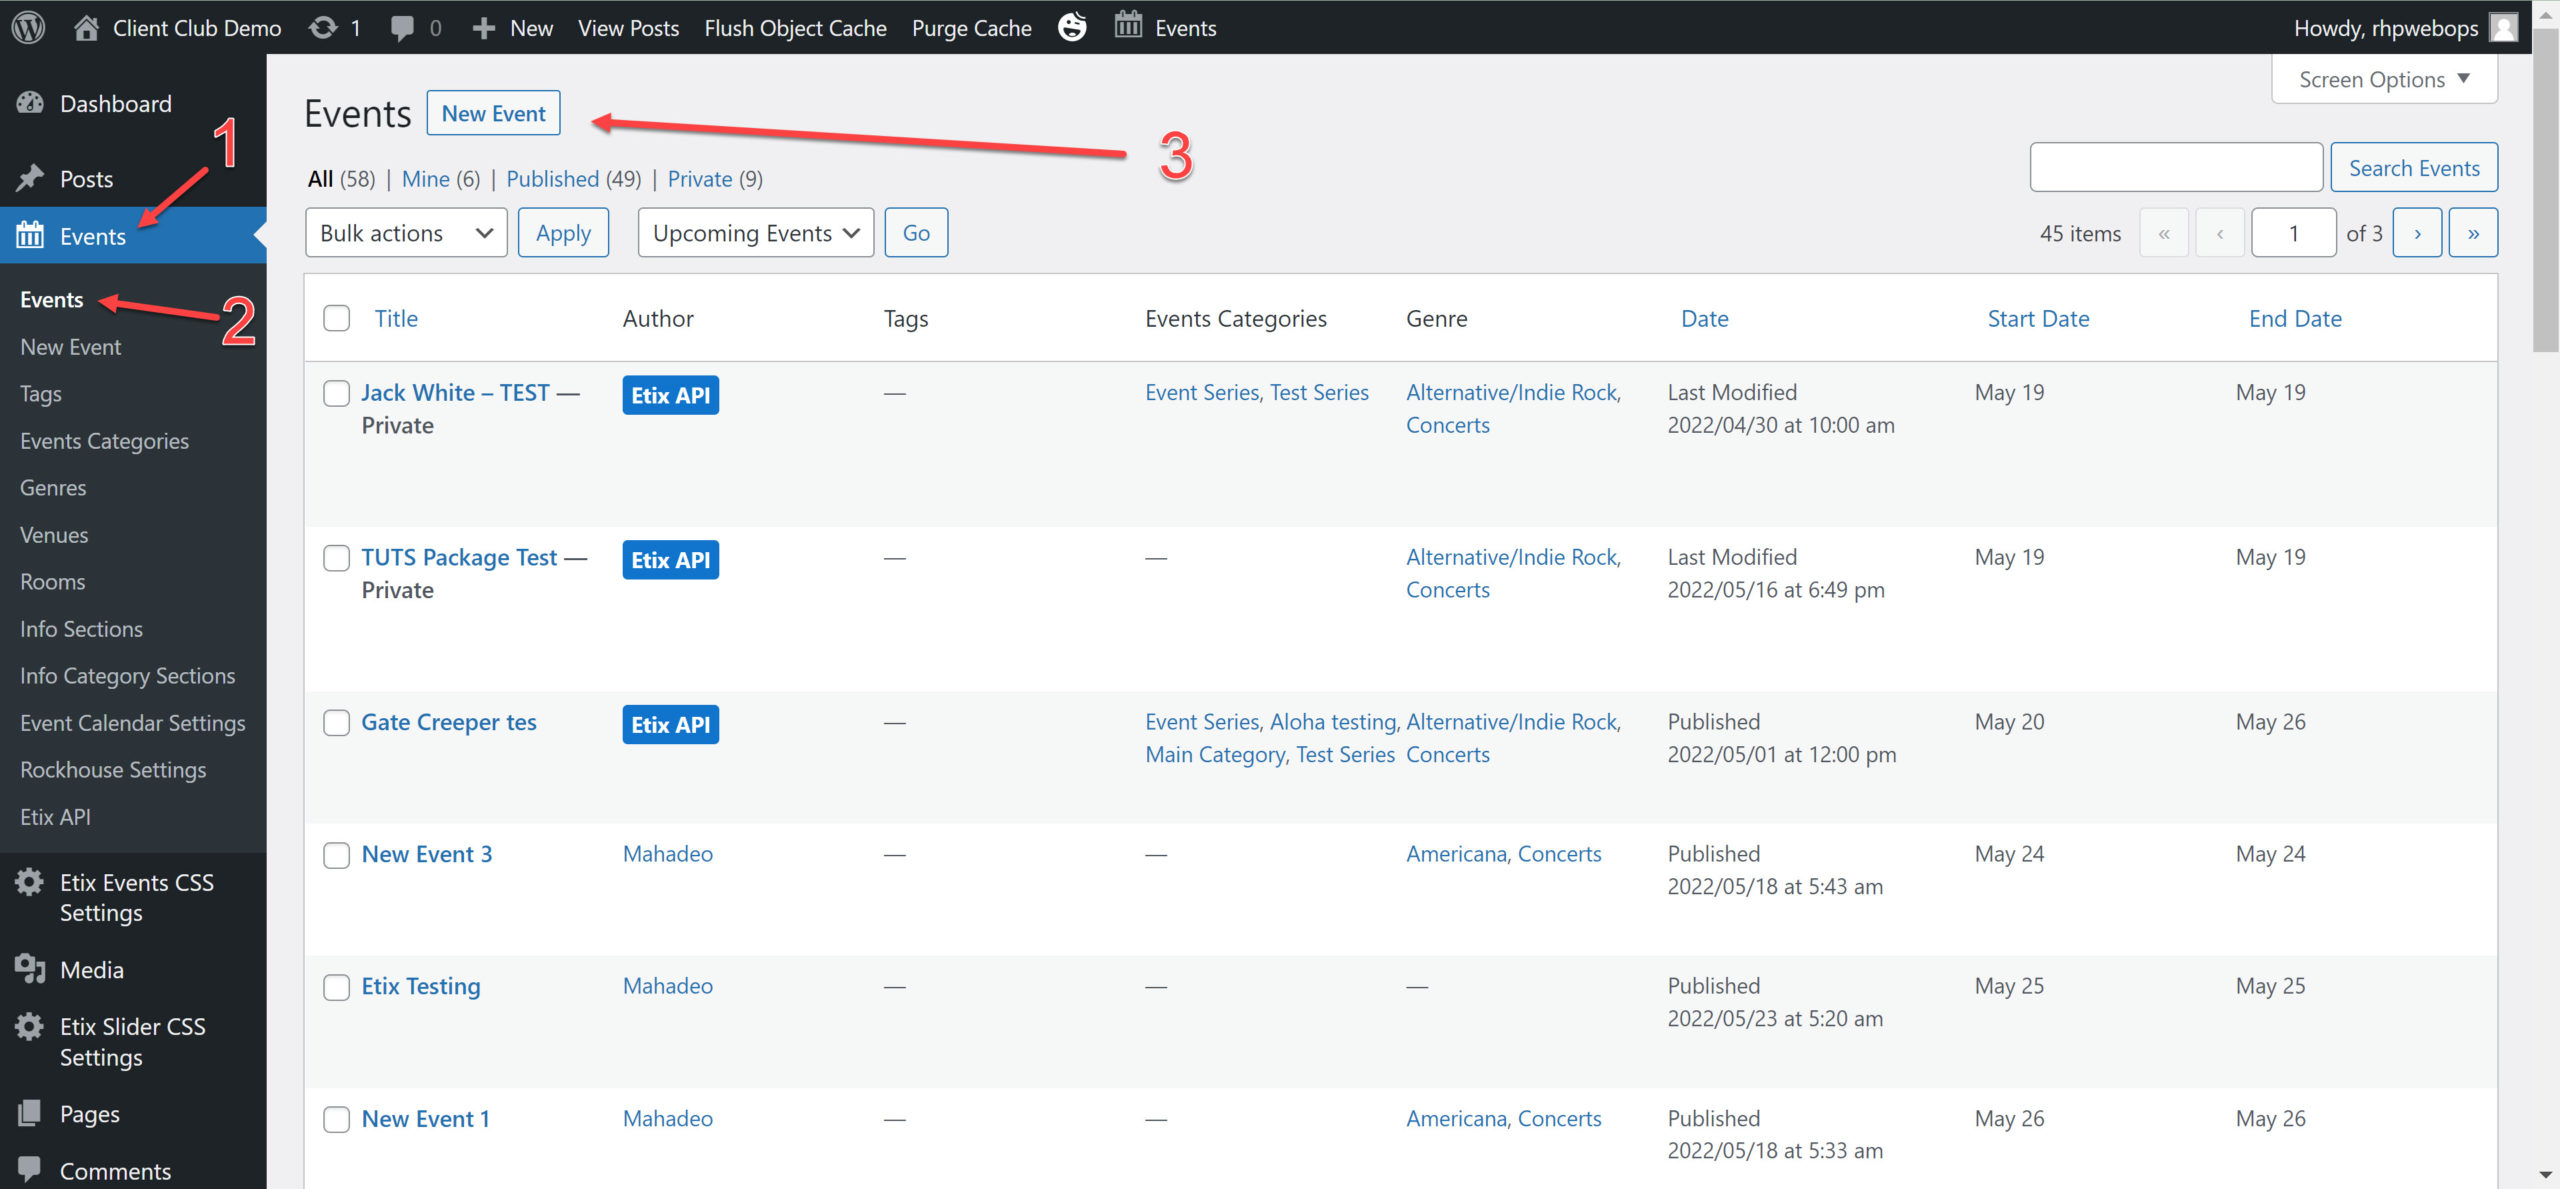
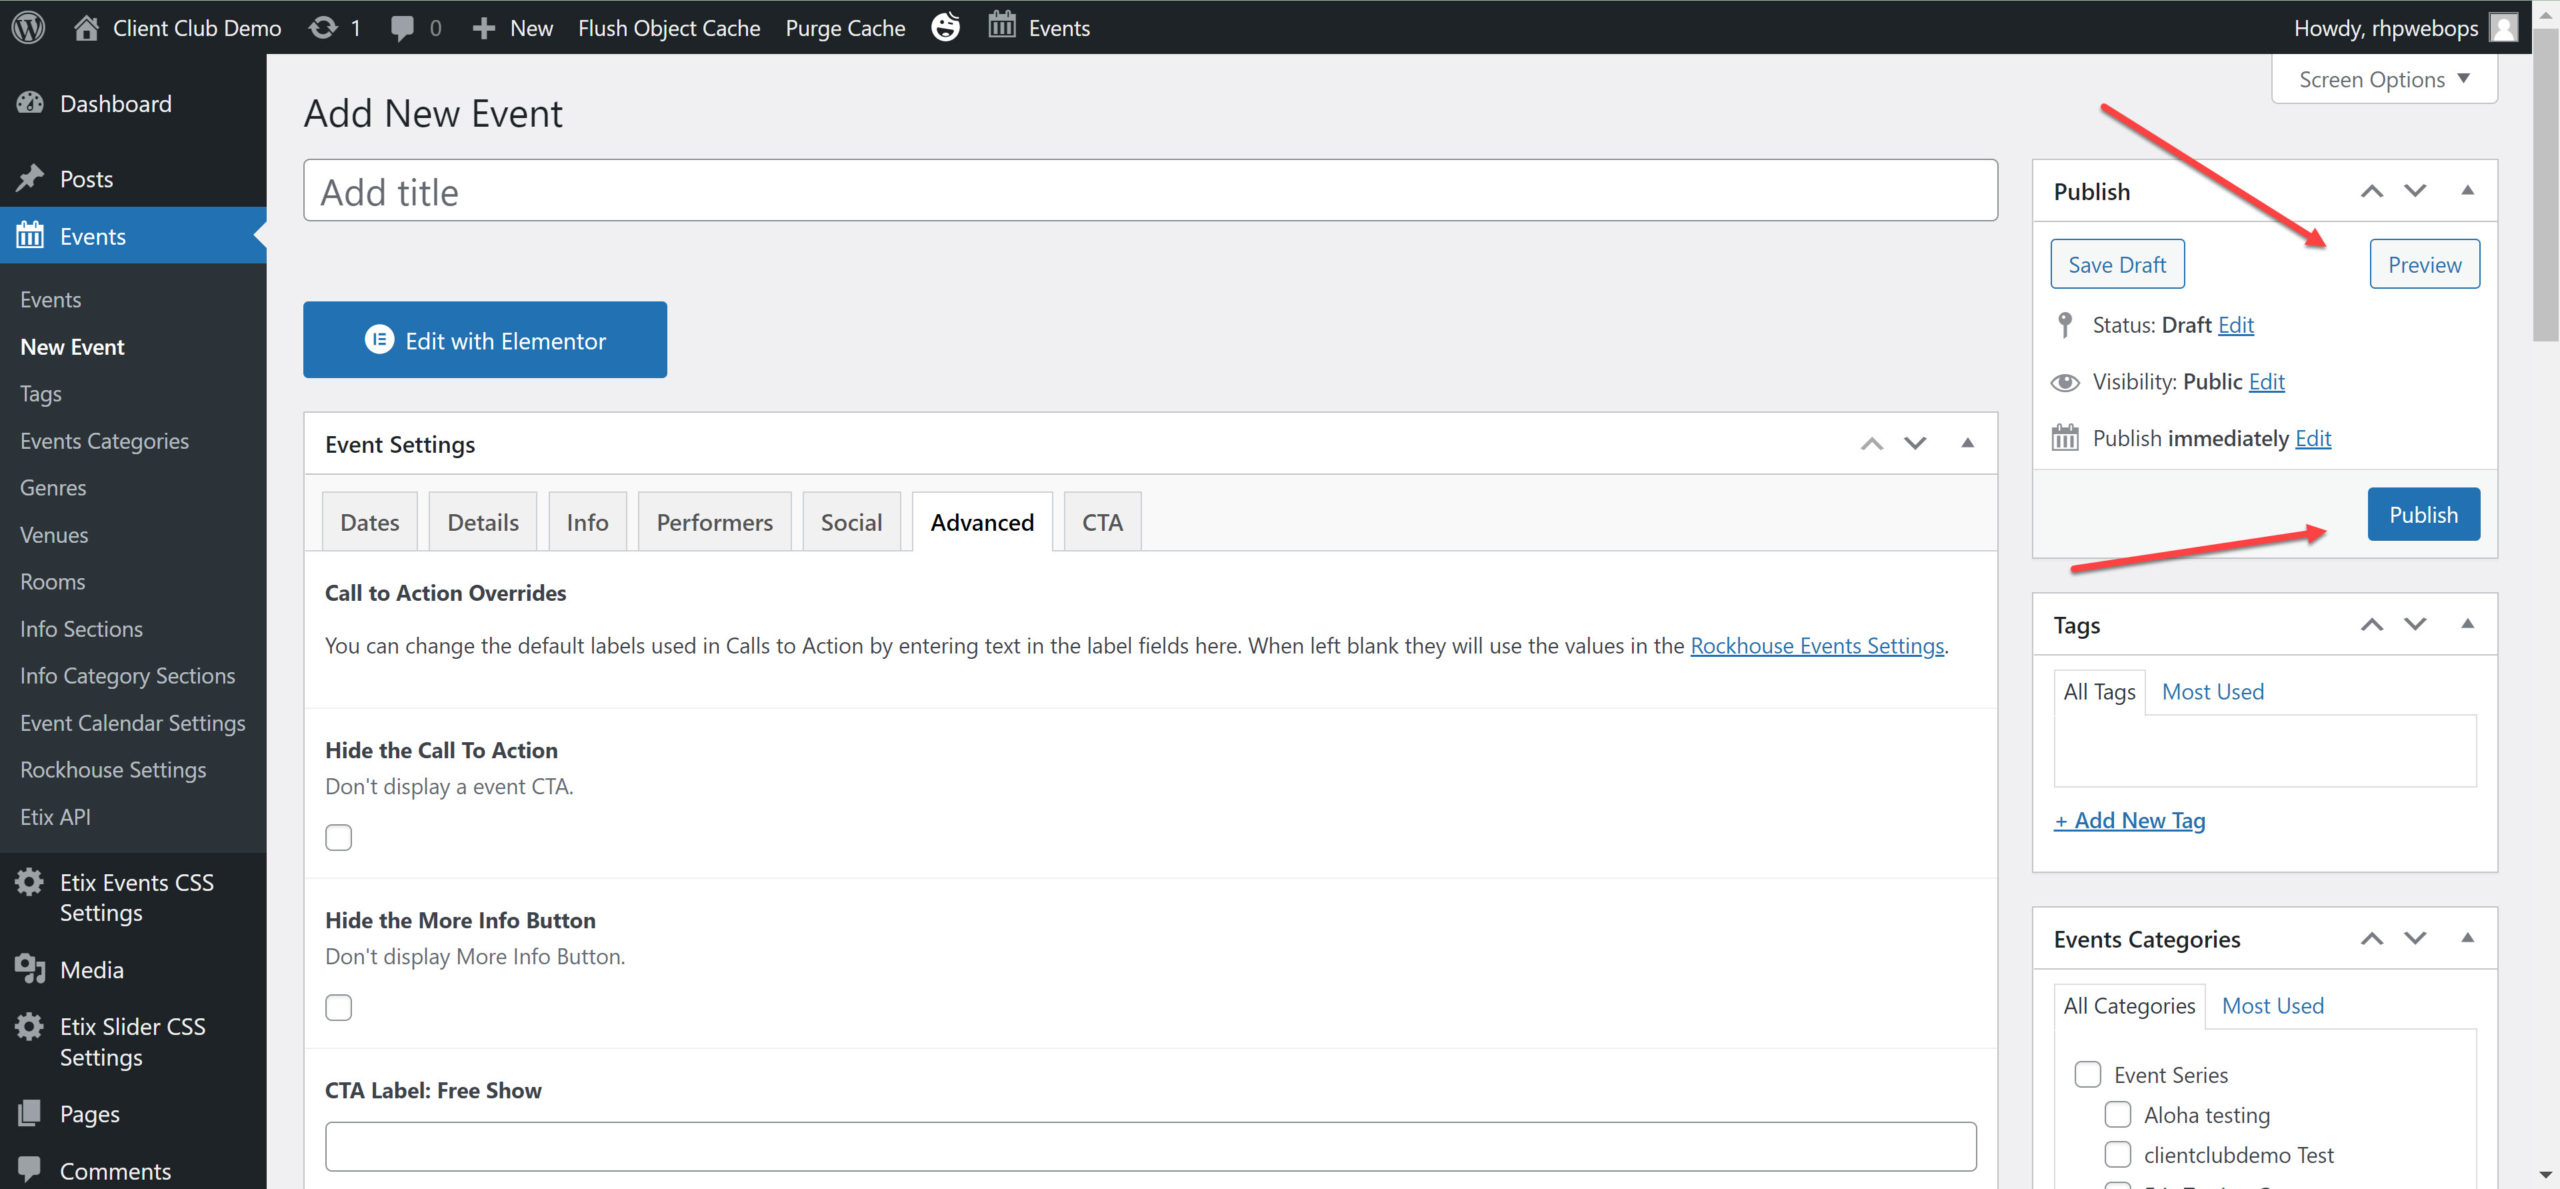
Events > Events> Click New Event
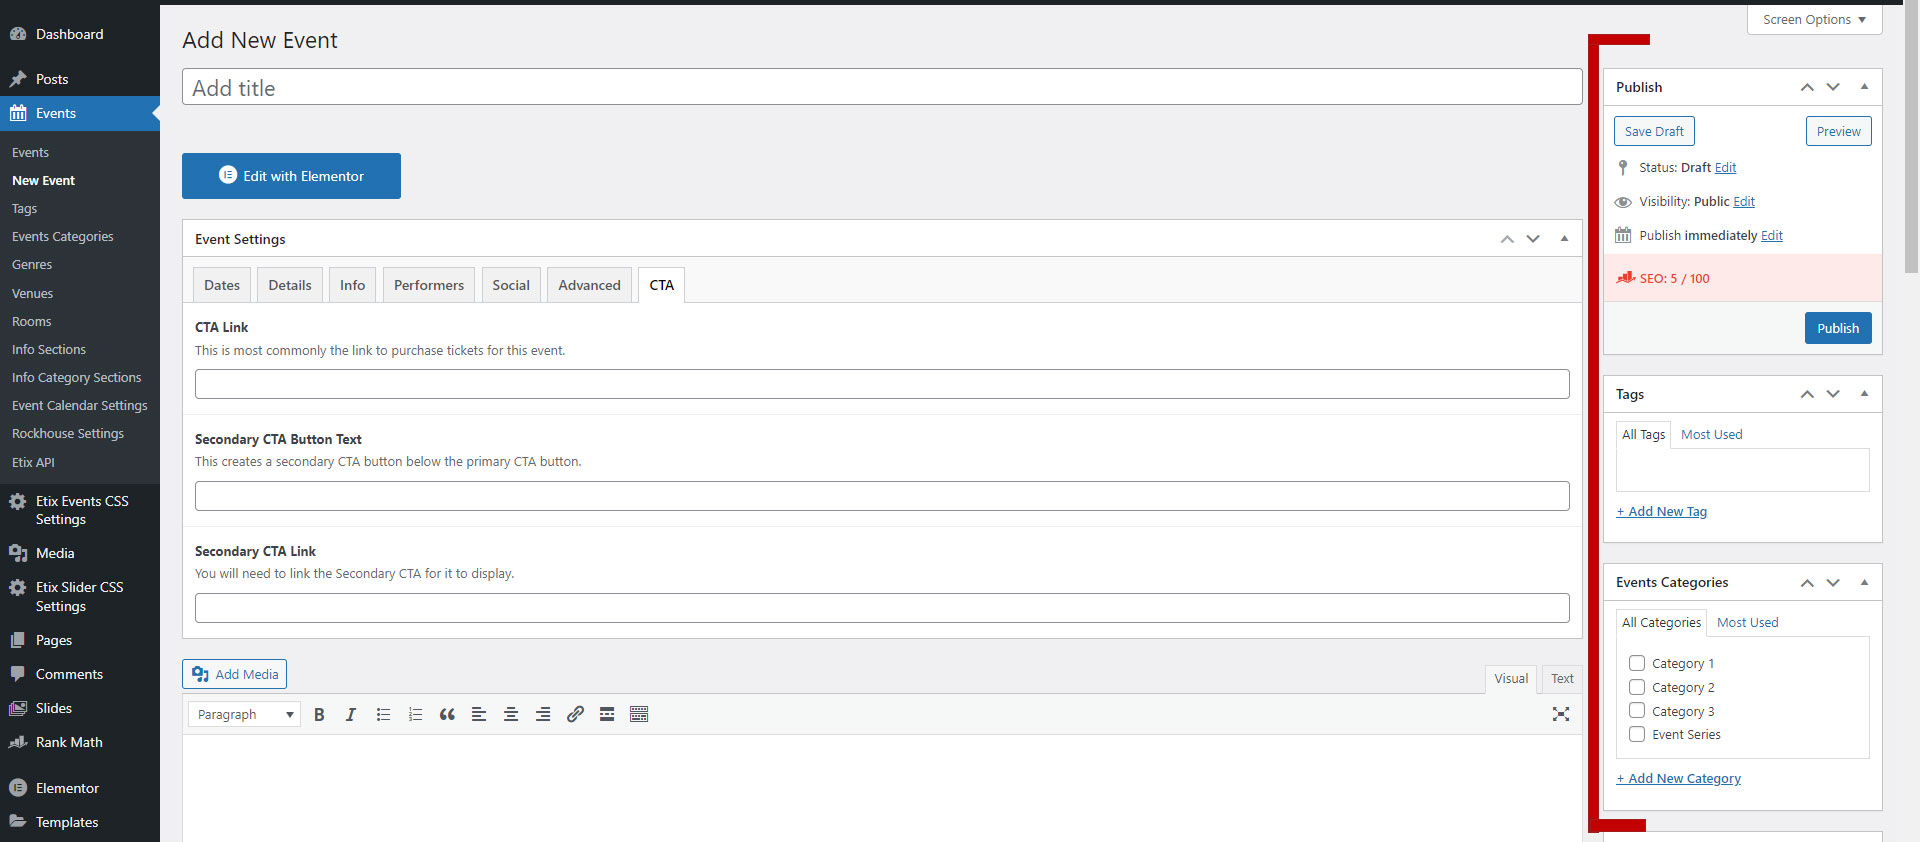
Once you click on New Event, the building screen will populate. Here’s a list of the important fields to fill out on this first screen, the Dates tab of the Event Settings:
Event Title
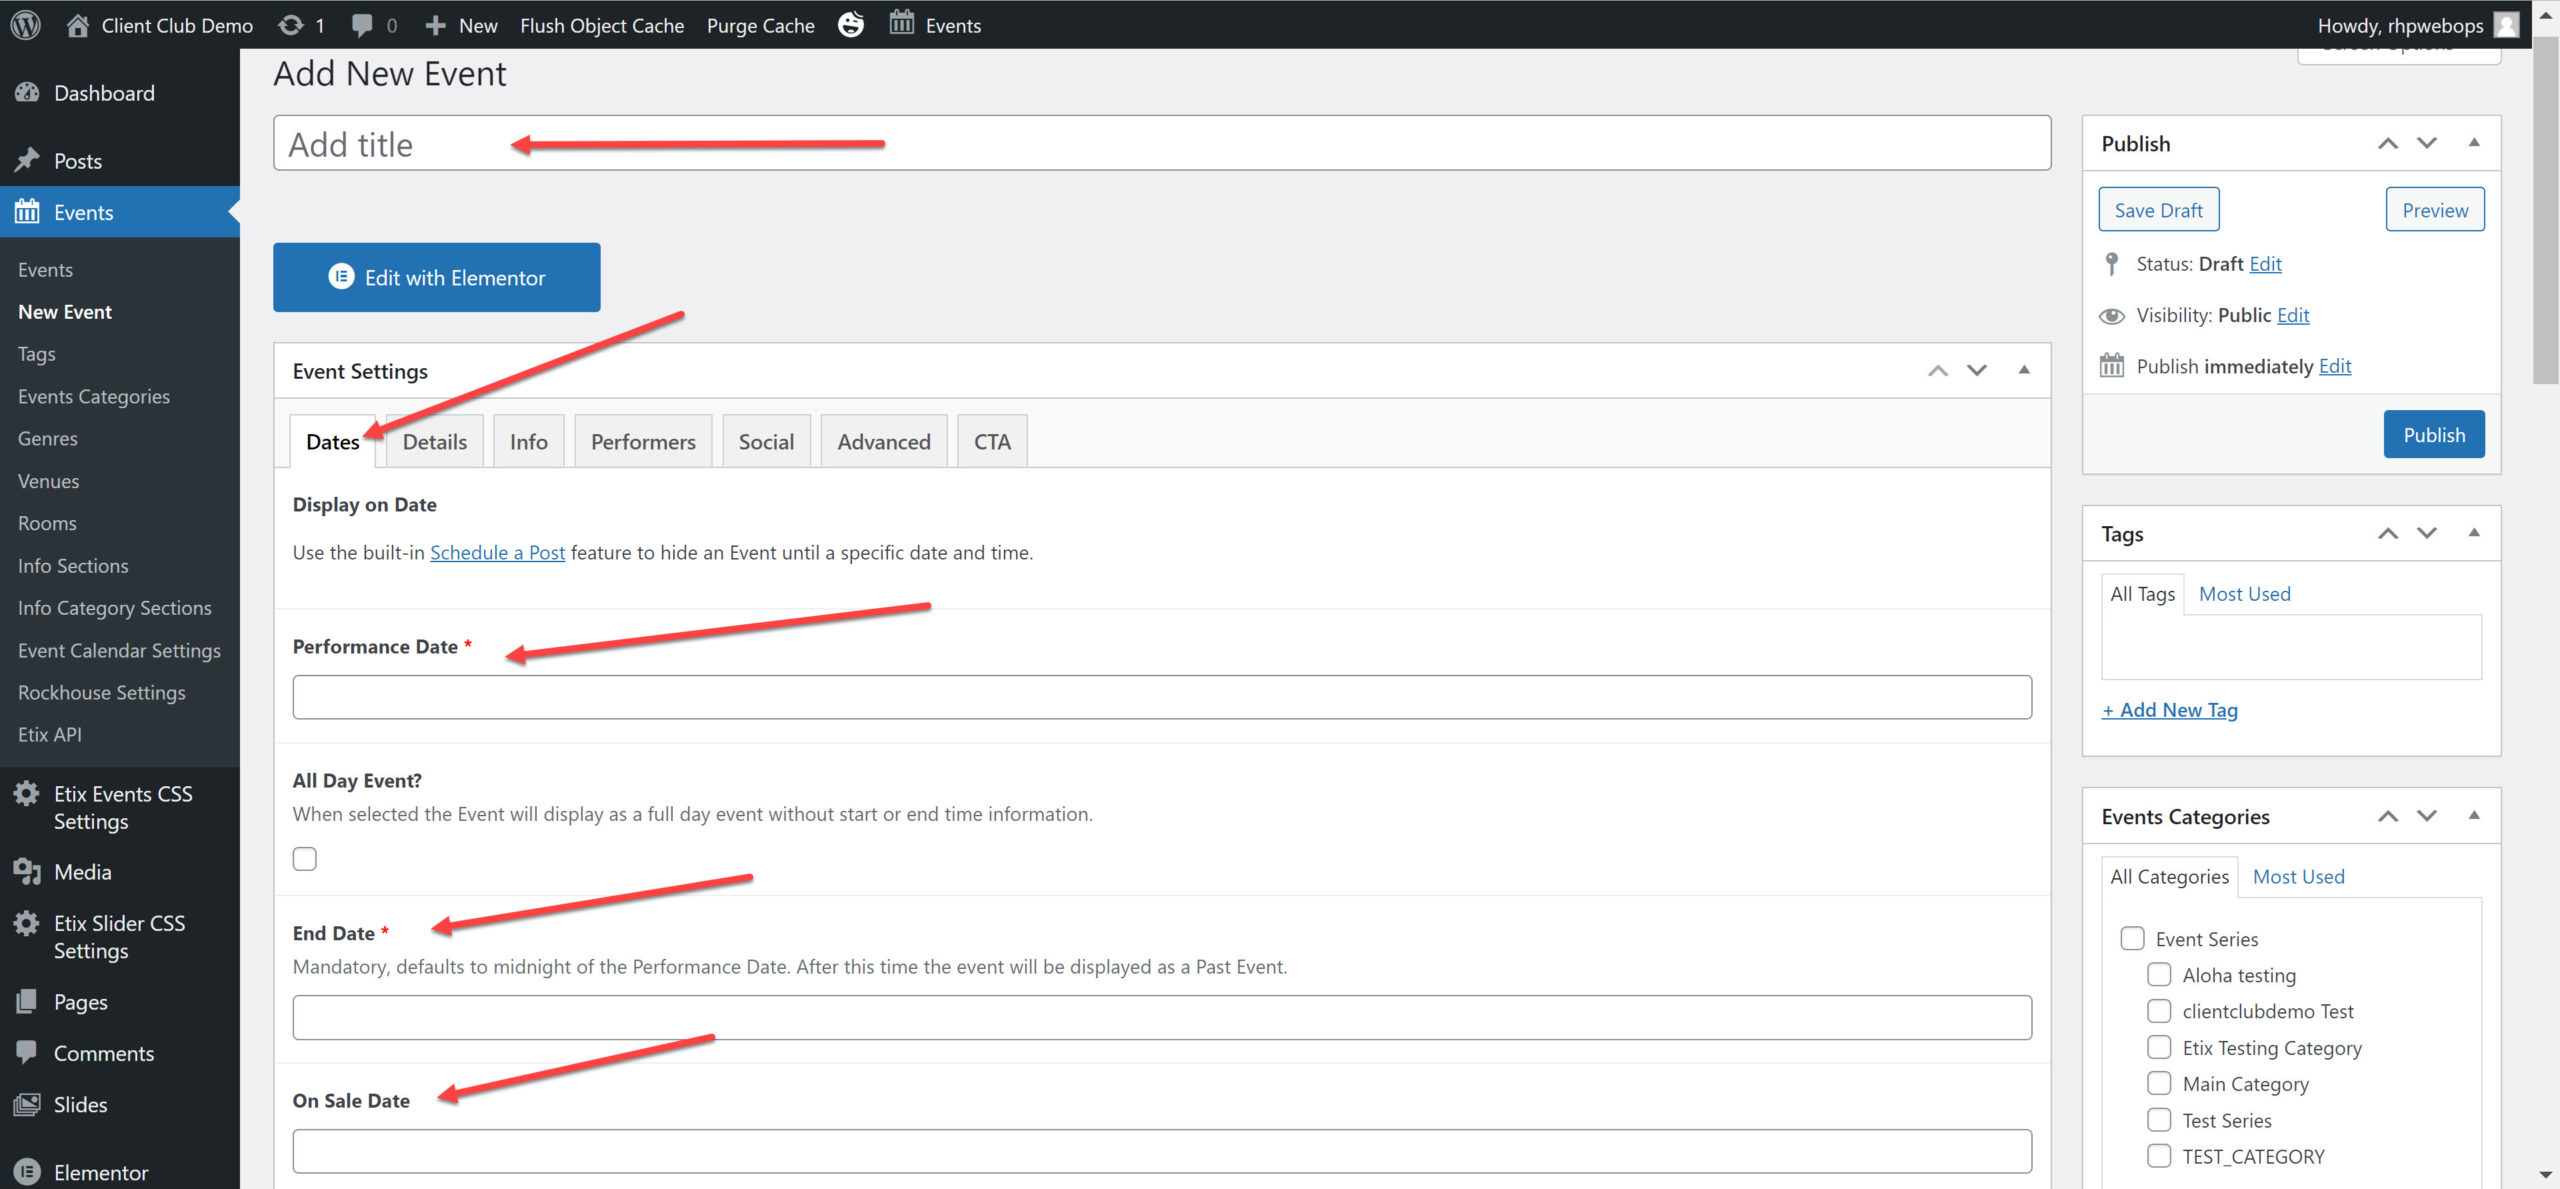
Performance Date
End Date (Typically make this 11:59PM. It’s the date/time that the event will no longer show on the website)
On Sale Date
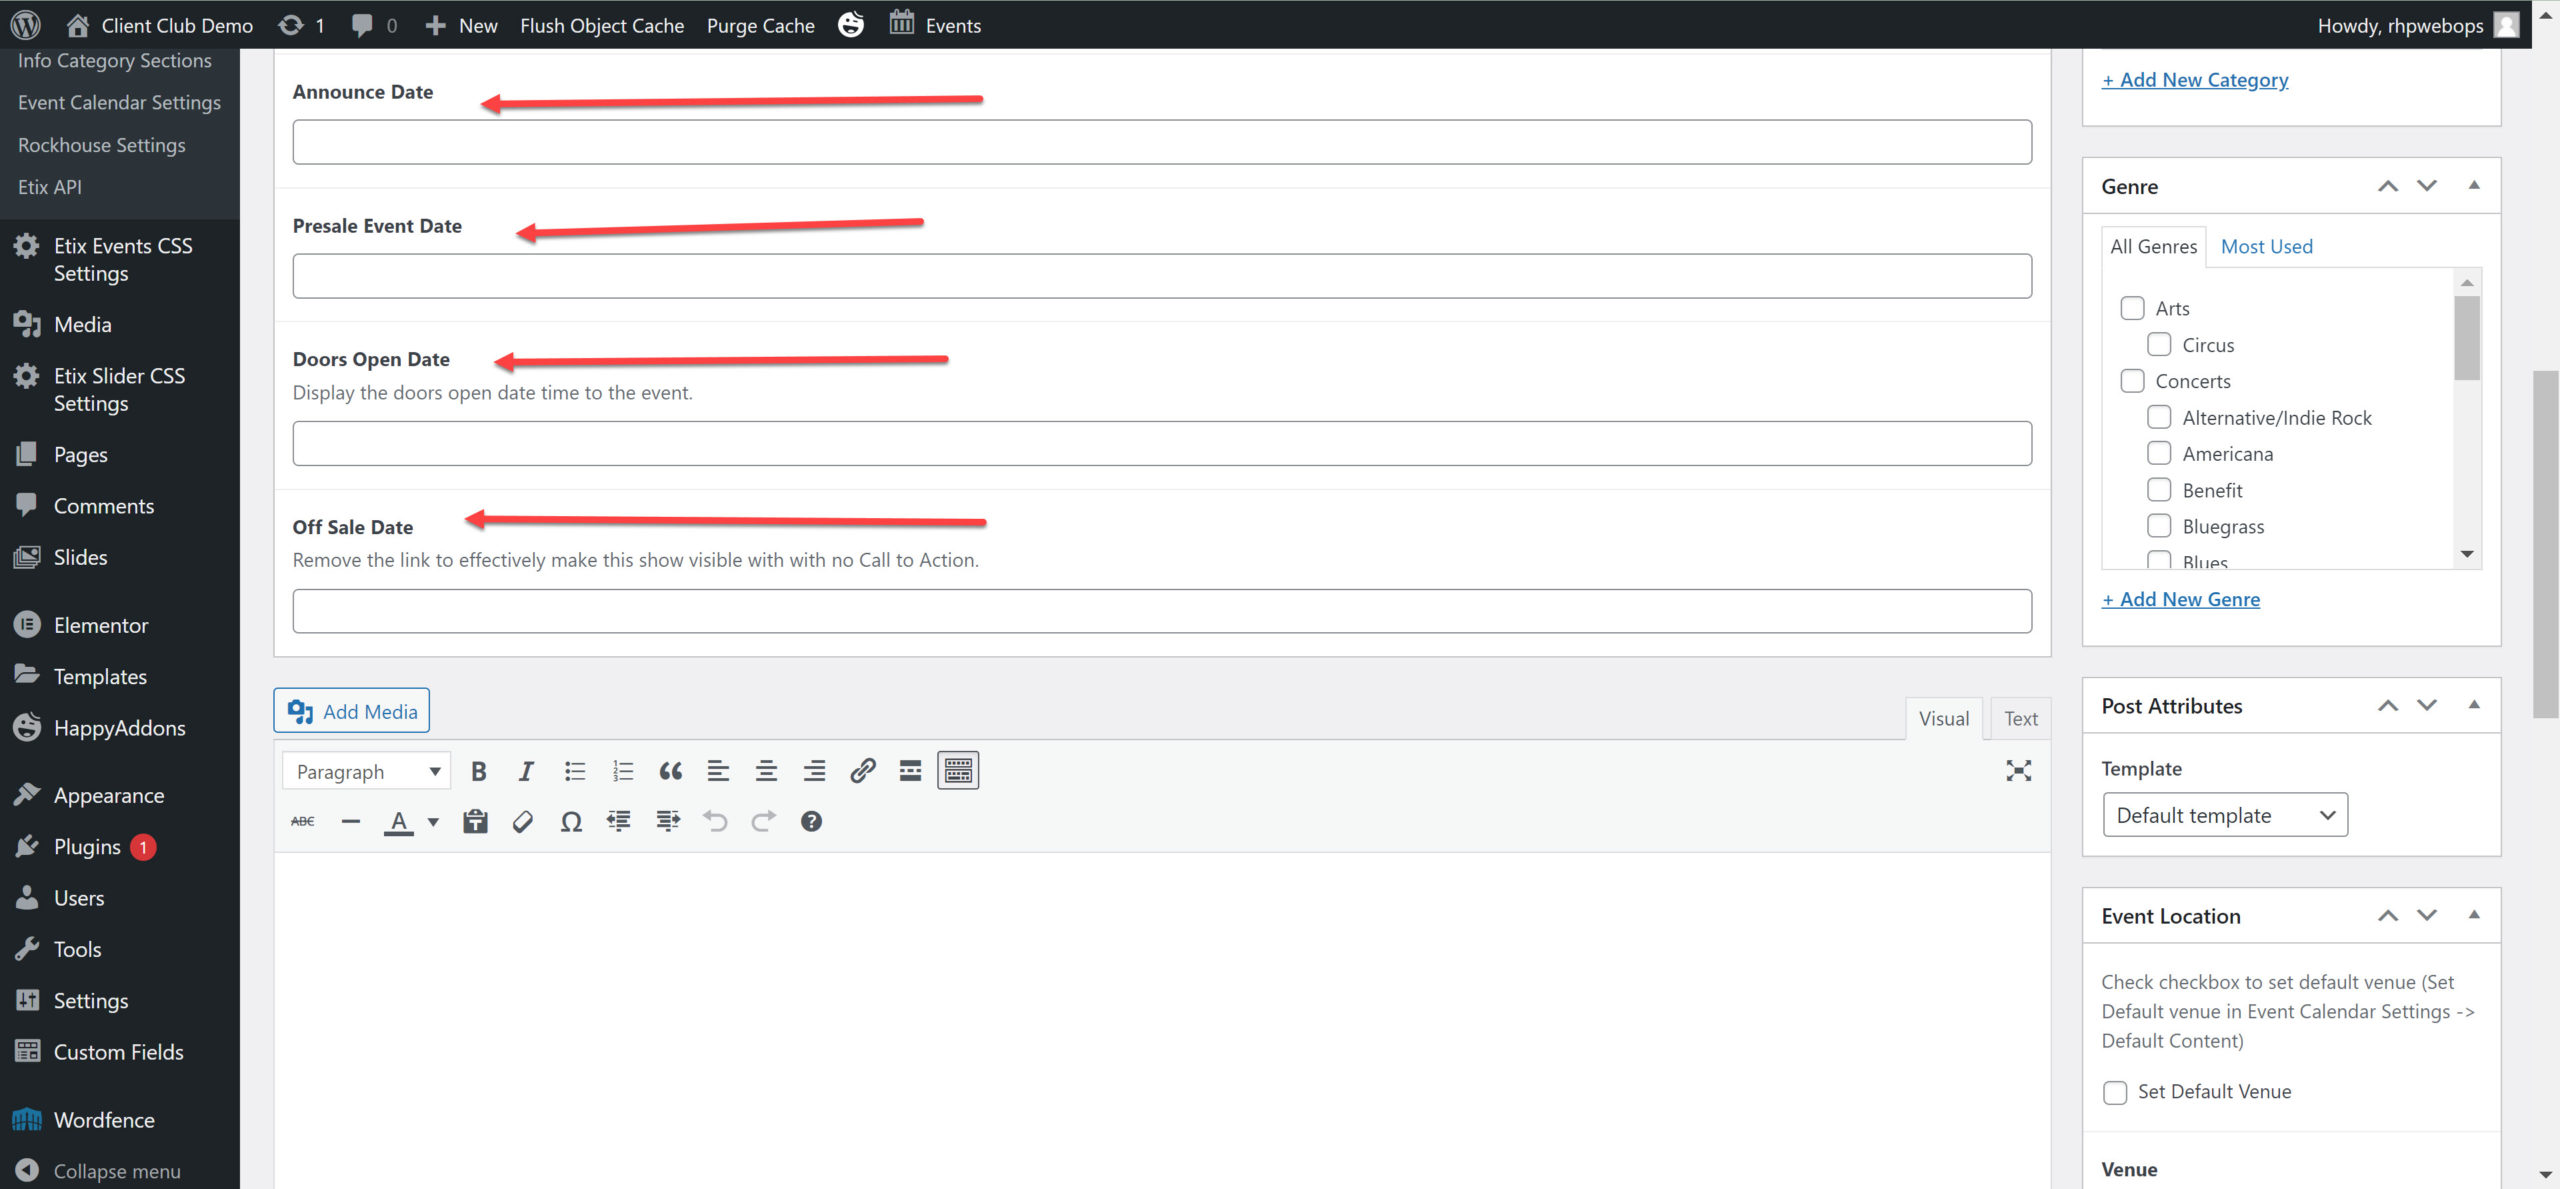
Announce Date
Doors Open Date
Text box – This is where all of your show information, artist background, etc. will go.
Next you’ll want to tab over to Details:
Event Cost
Age Restriction (Leave blank if N/A)
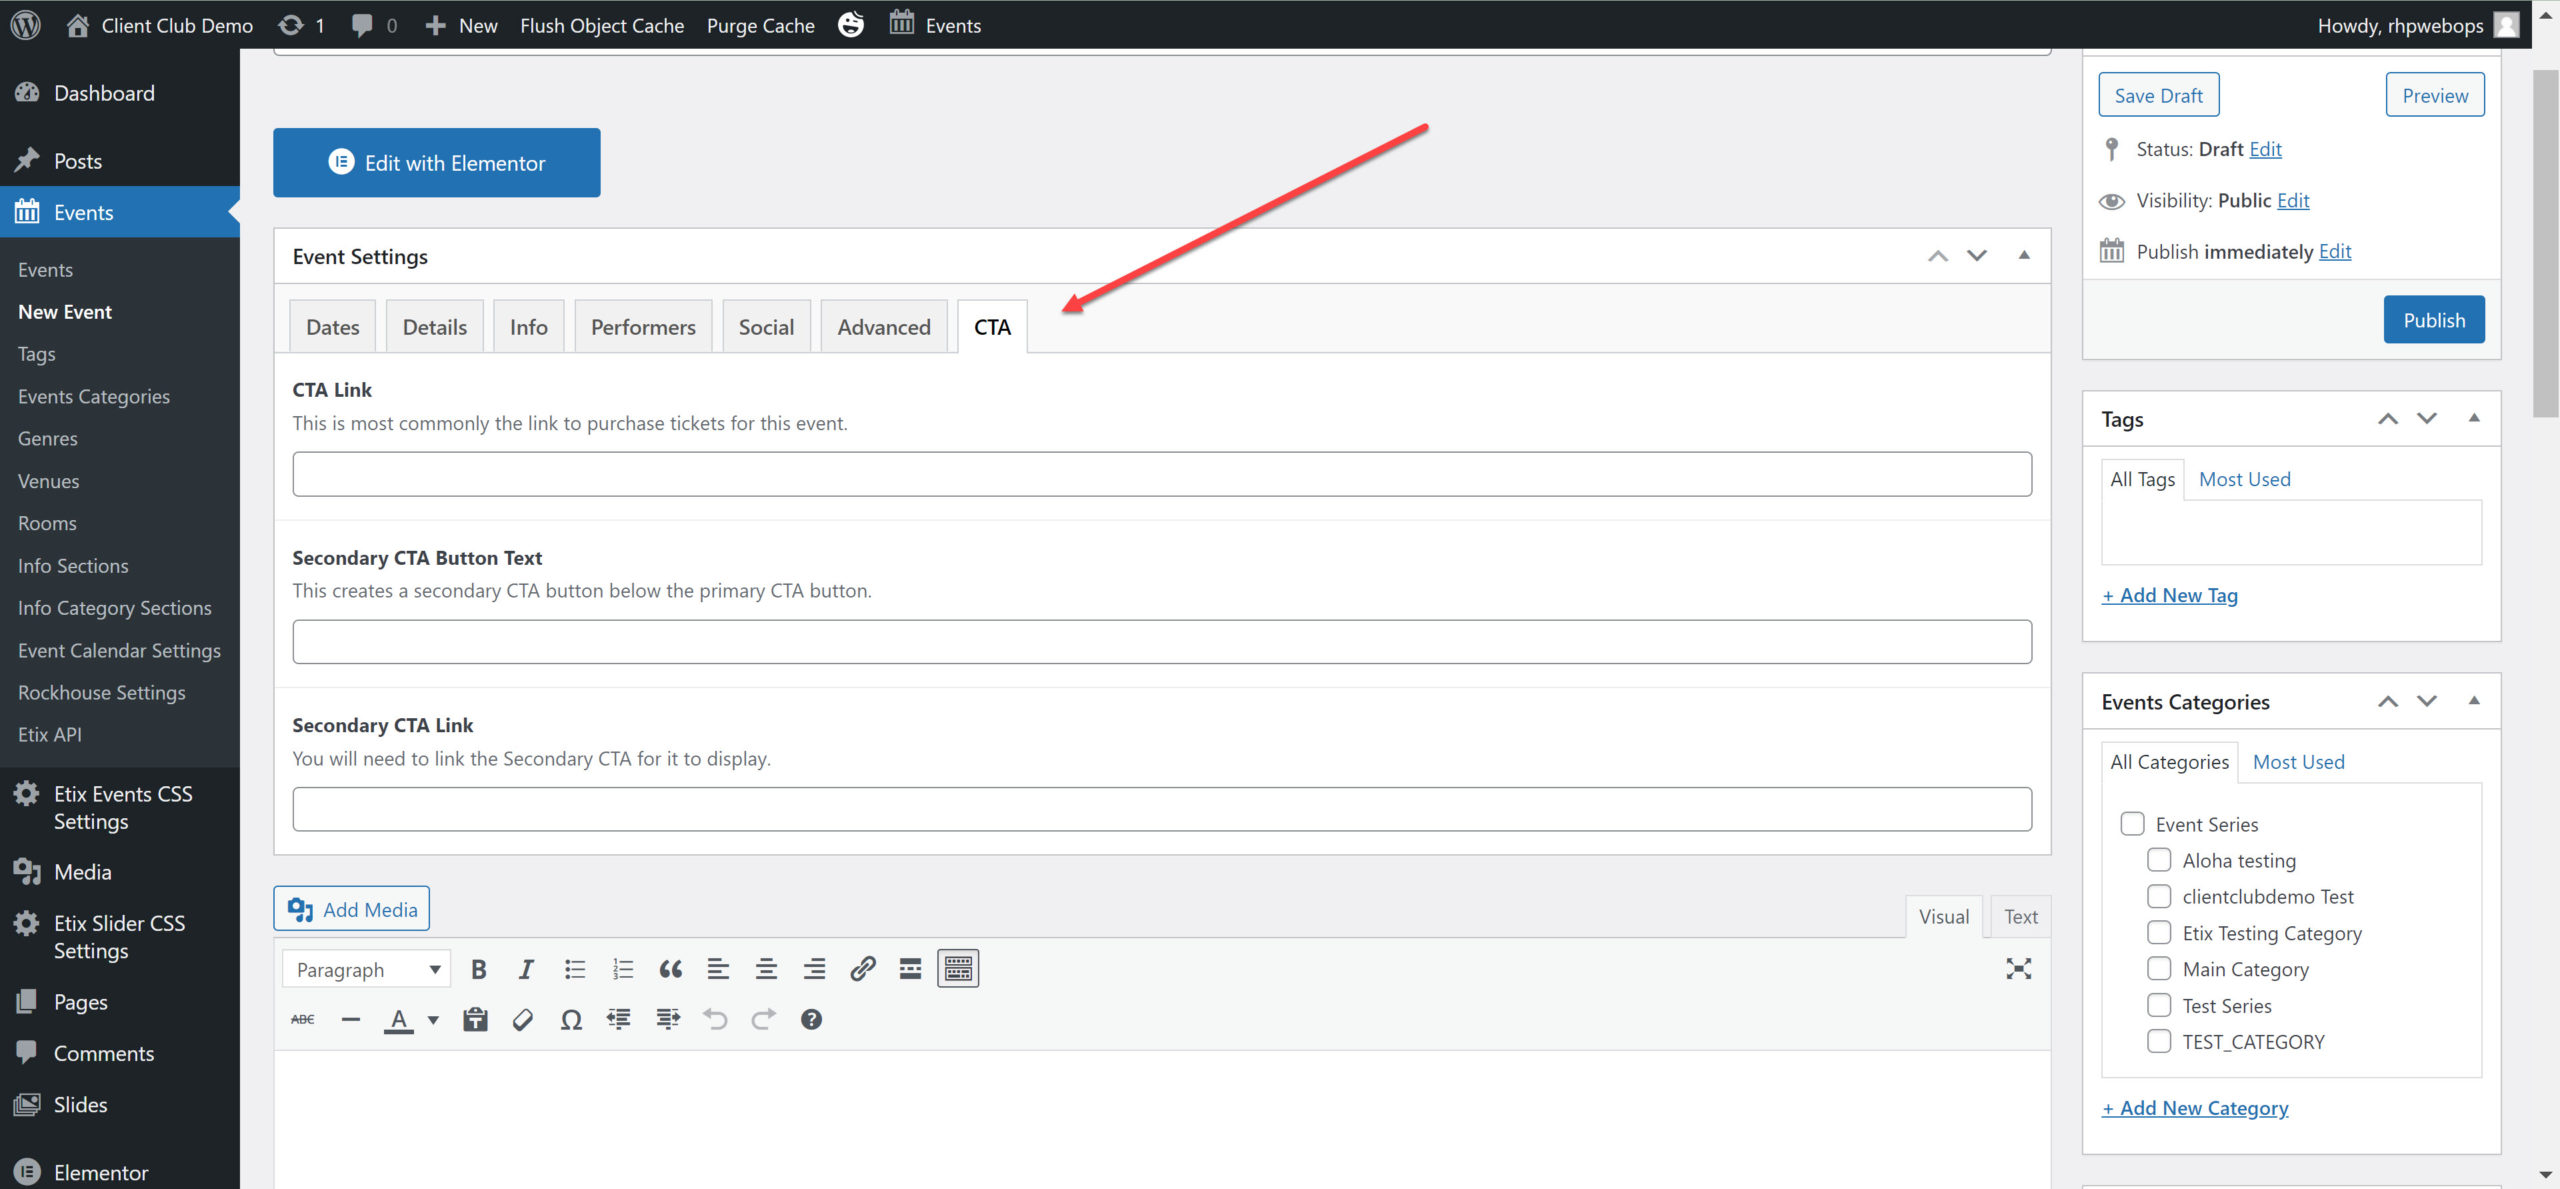
And most importantly, the CTA tab. This is where you’ll put those external eventbrite links. Just copy and paste the link in that first box, the CTA Link.
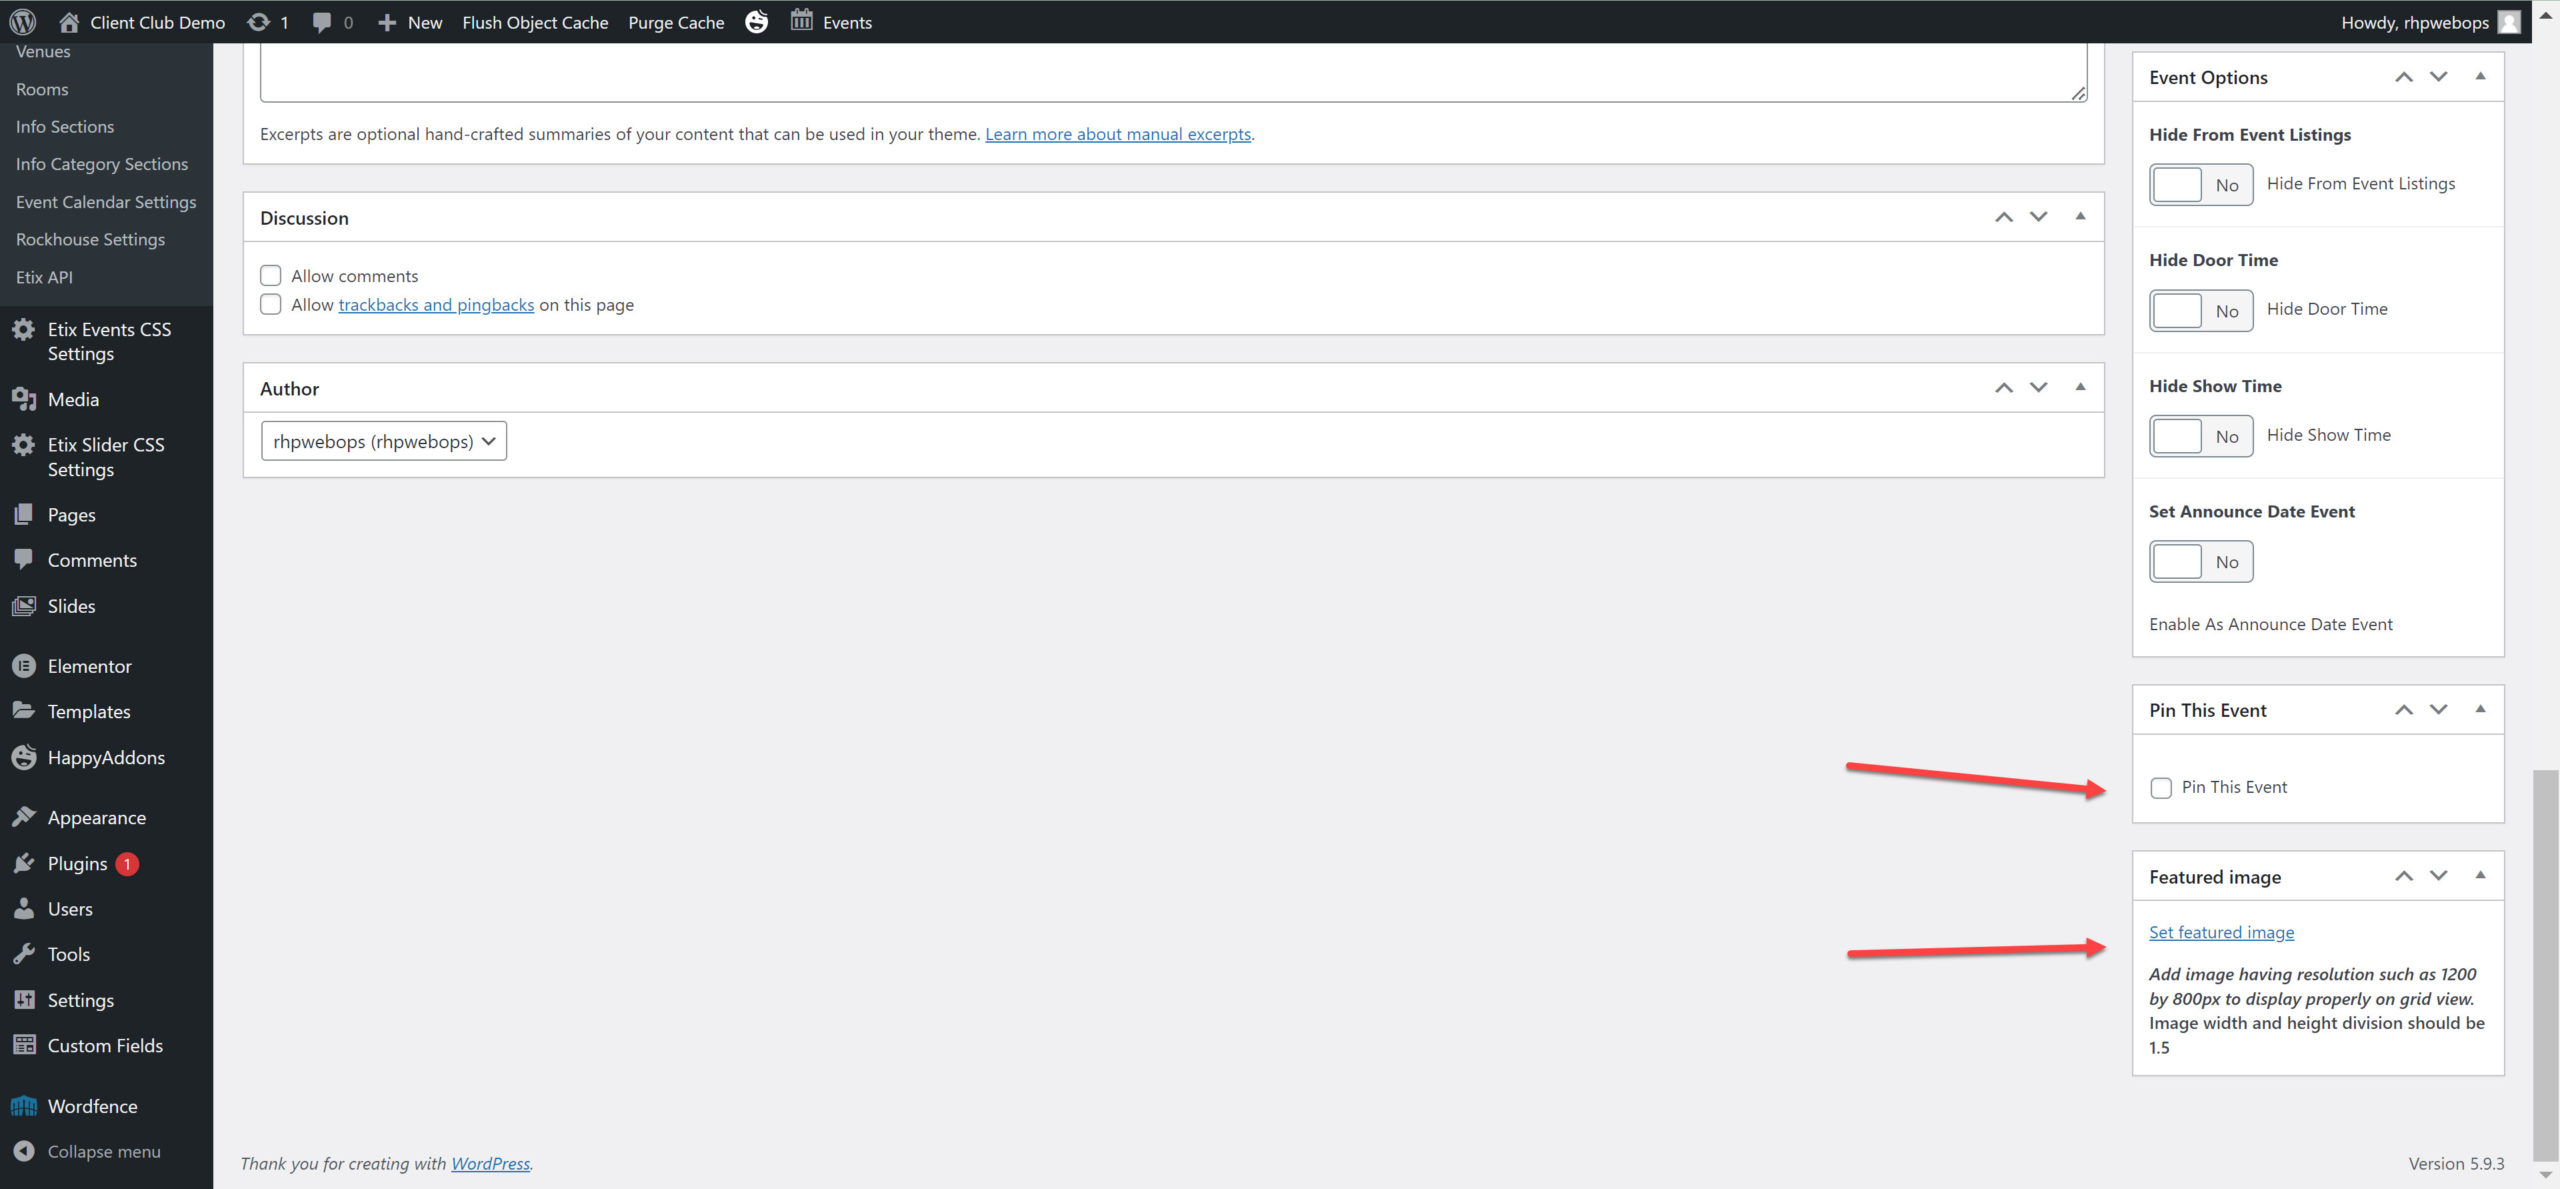
Next, we need to update the information in that right-hand column of the screen.
Here are the important things to fill out:
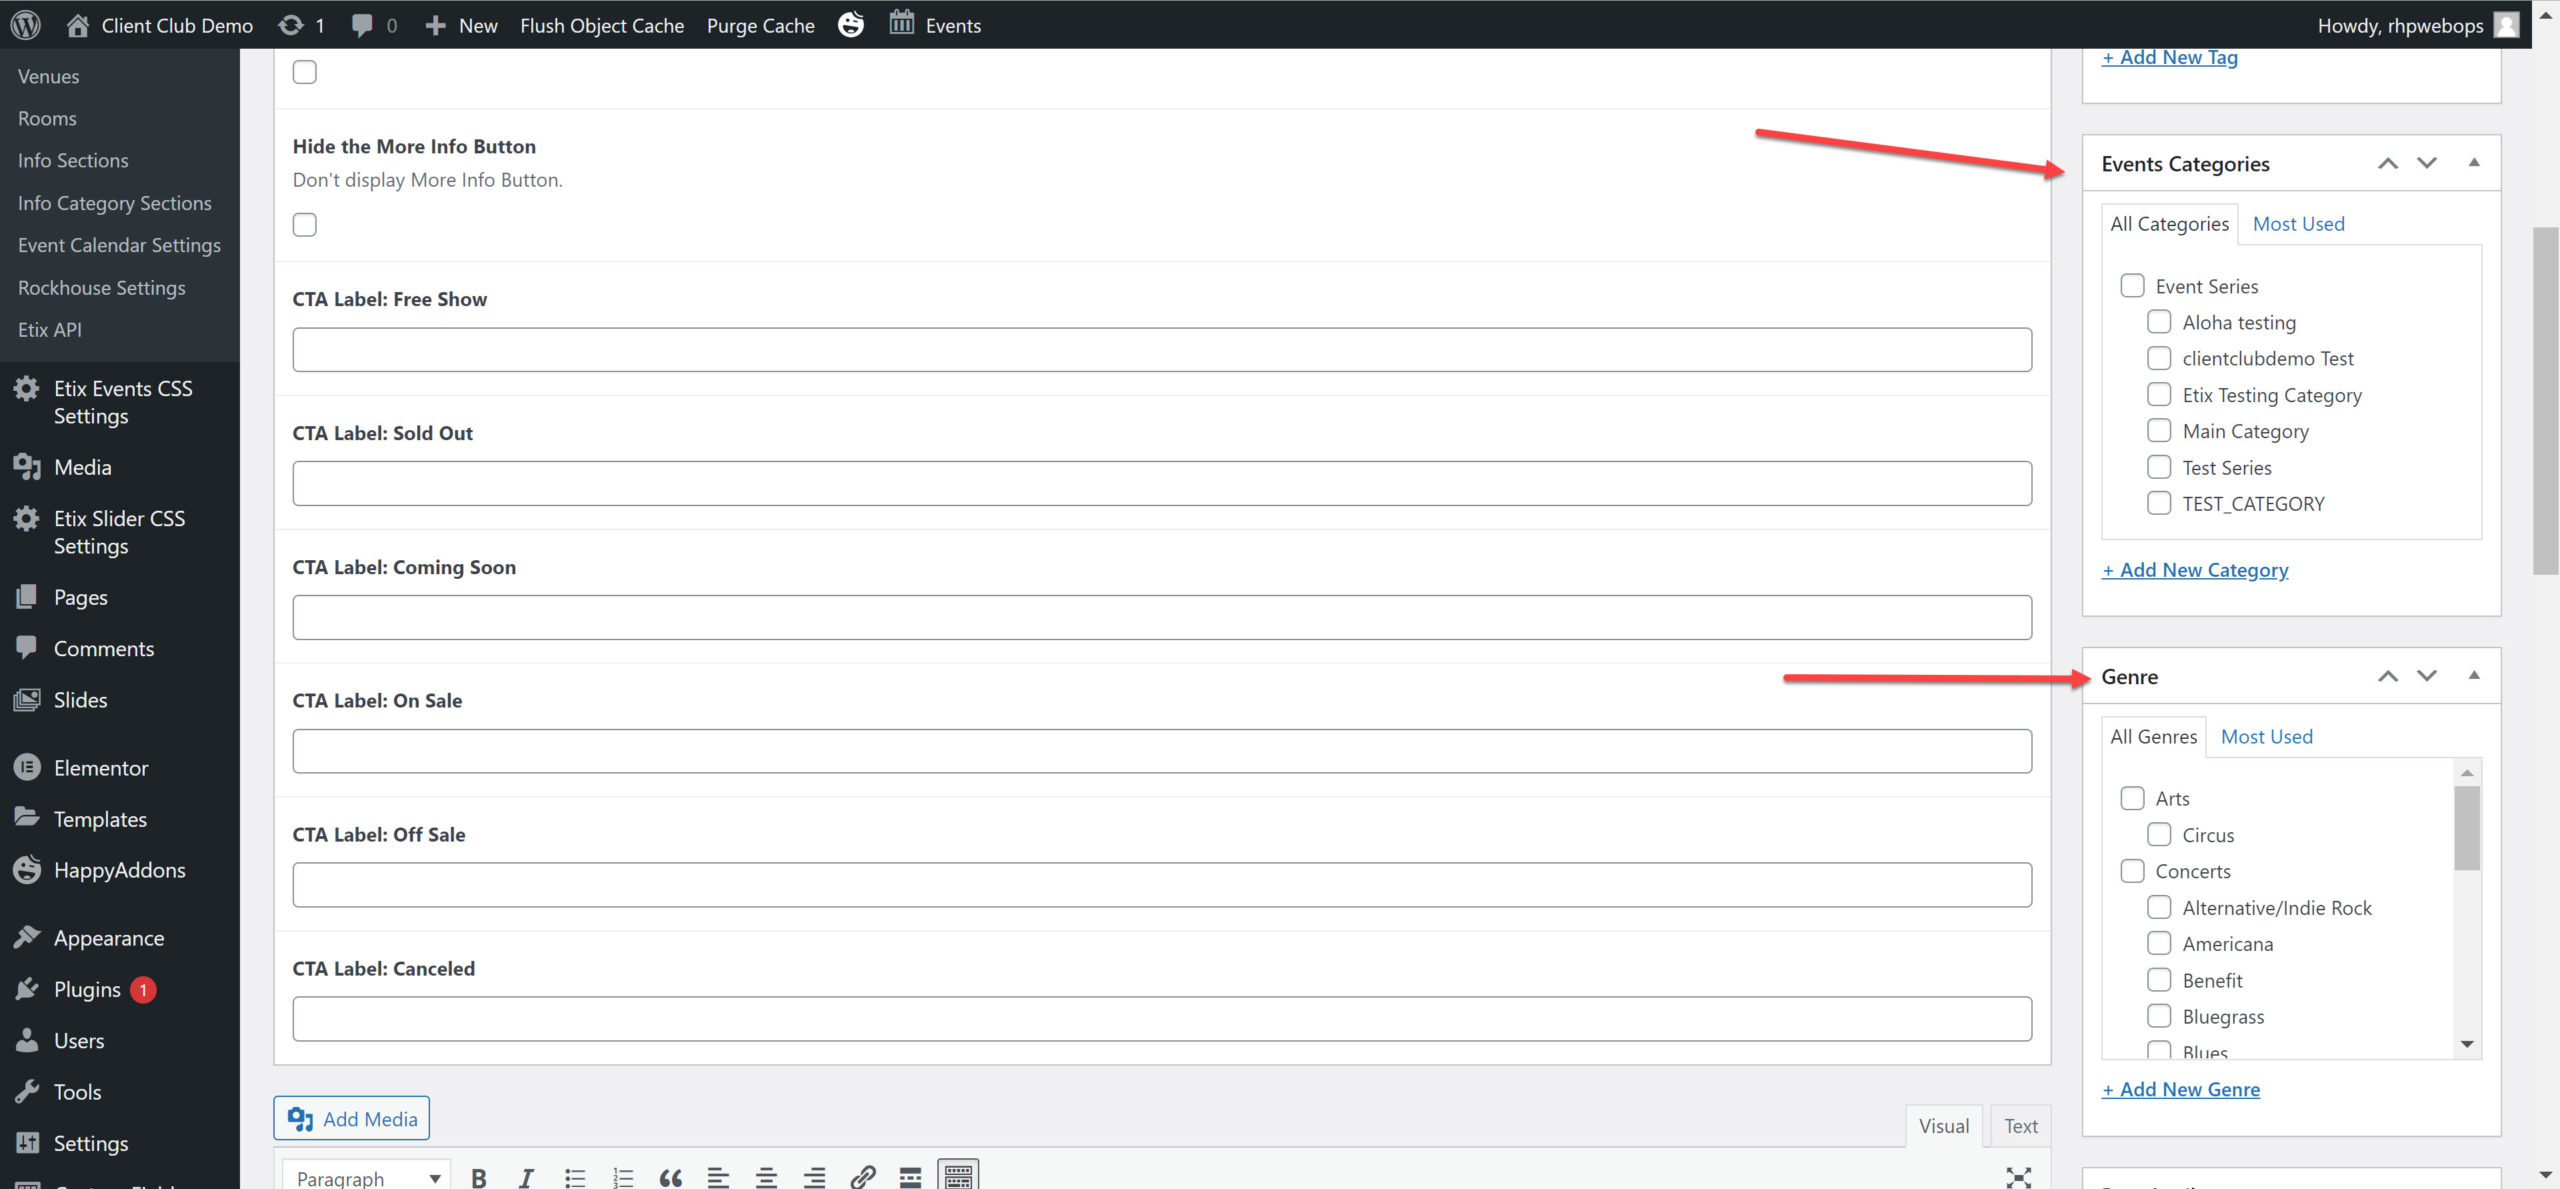
Genre
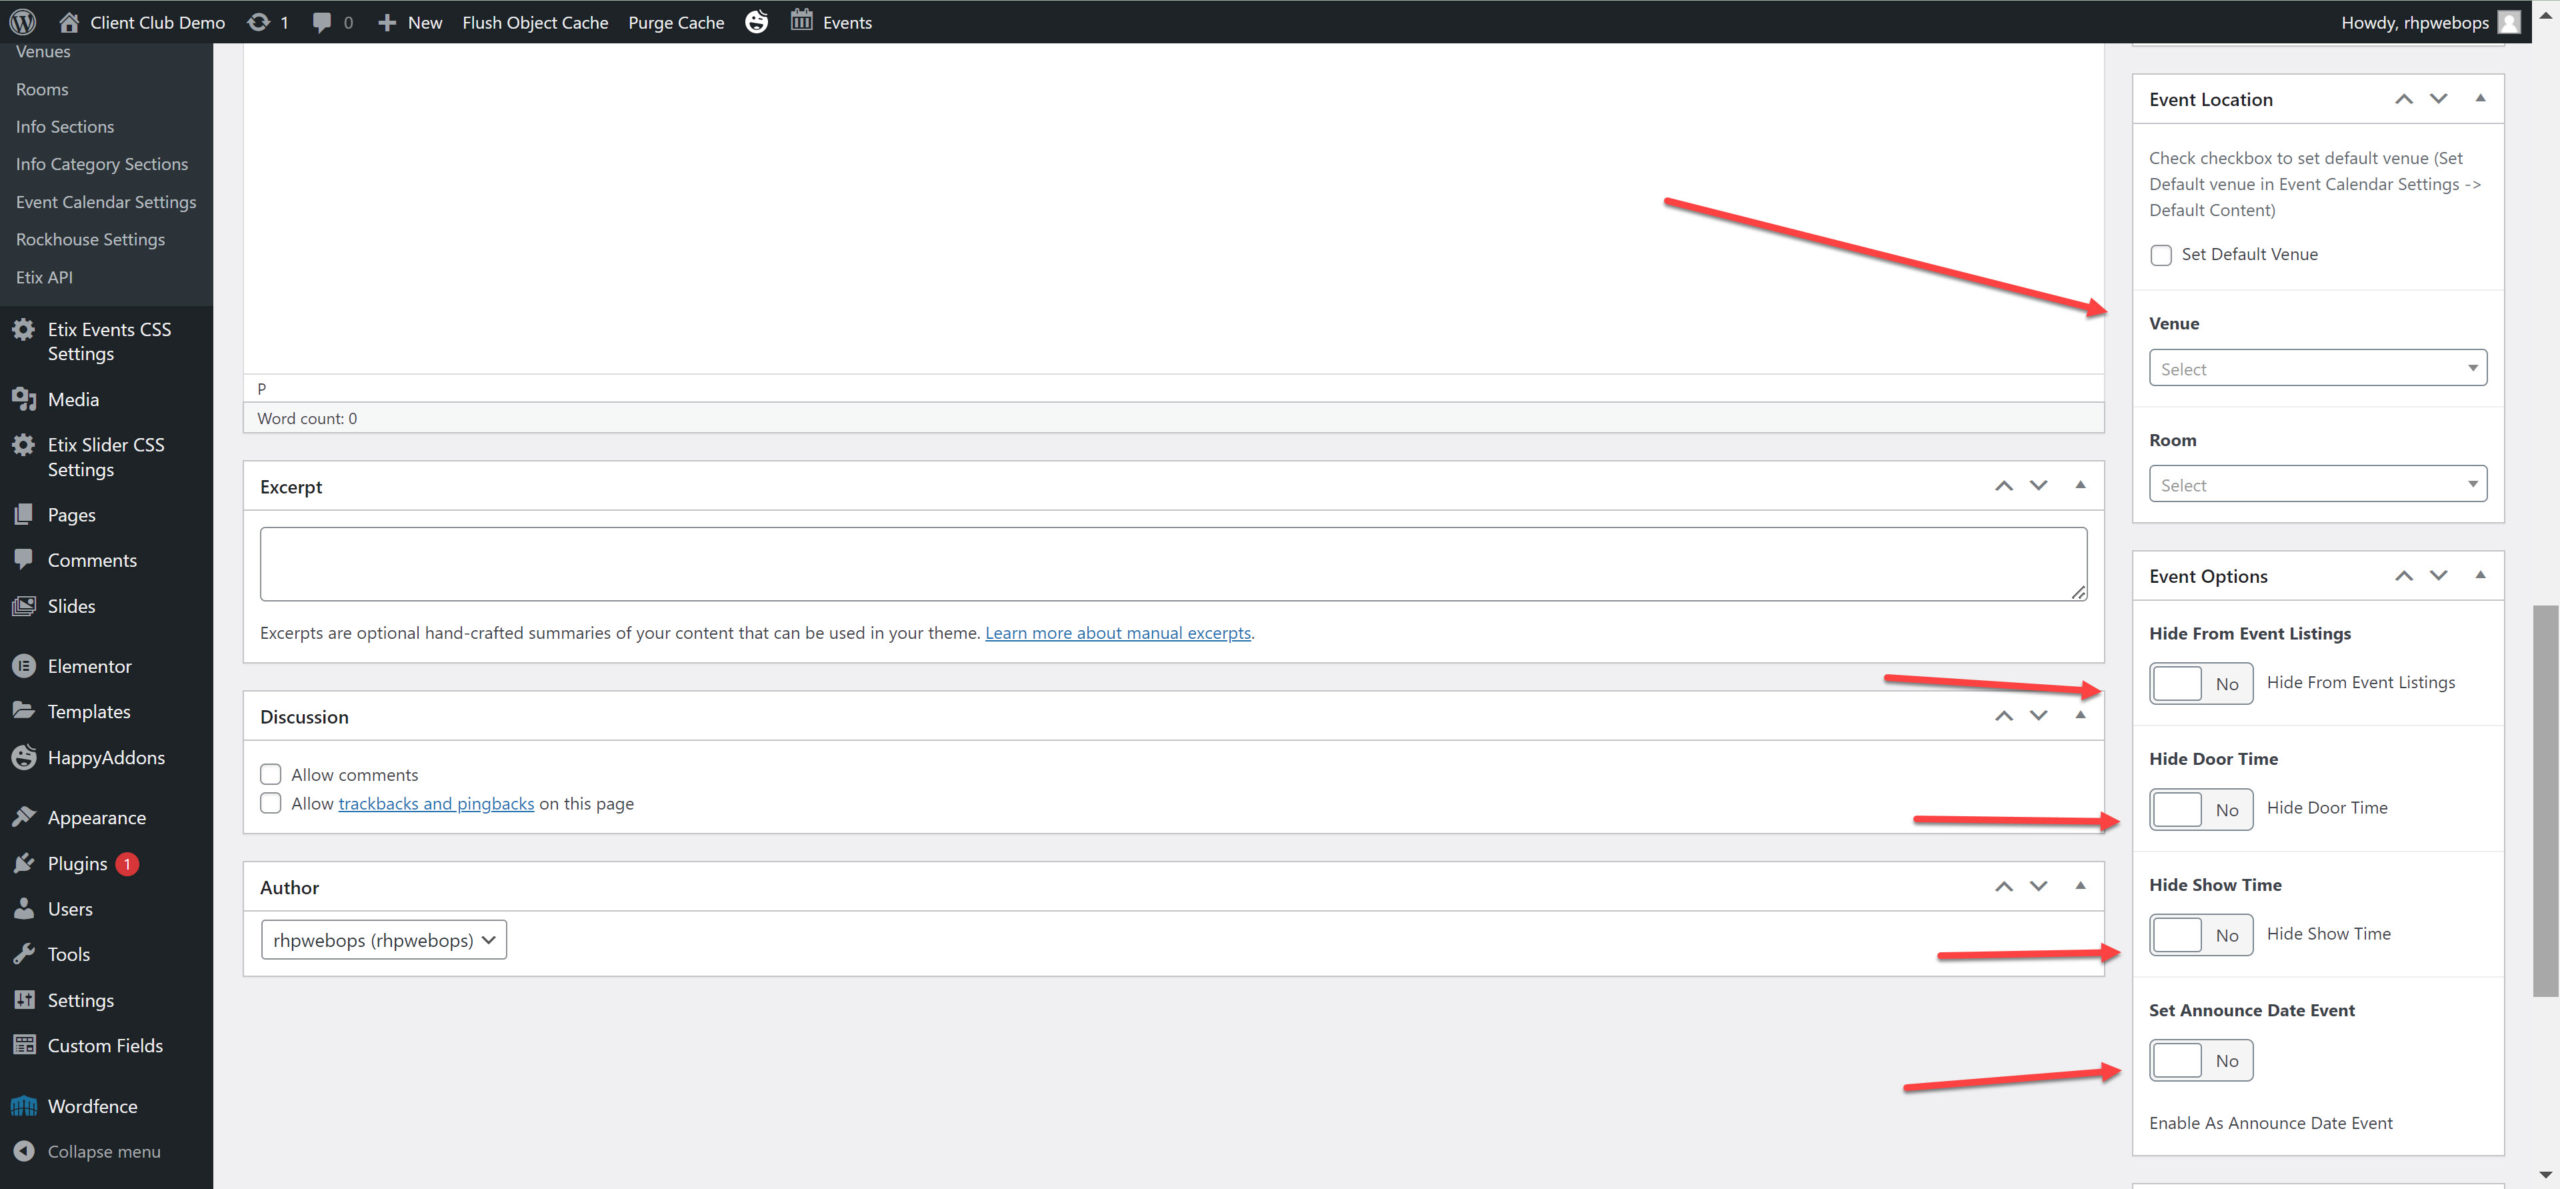
Event Location (Yours will start to populate as you type them in)
Featured Image – This is where you’ll put the artist image/whatever you want to have showing to replace the FYF logo
At the top right of this same column, you can Preview the page to make sure everything looks as it should, that links are working properly, etc. And then in that same box is the Publish button, which will push the event live on your site!
Detailed Version
Step 1: Events > Events> Click New Event
Step 2: Once you click New Event, the event building screen will appear.
The first mandatory field is the Event Title.
Under the Dates Tab there are other important fields.
Performance Date (Mandatory)
All Day Event
End Date (Mandatory) This is the date/time that the event will no longer appear on the website. Typically make this 11:59 PM.
On Sale Date
Announce Date
Presale Event Date
Doors Open Date
Off Sale Date
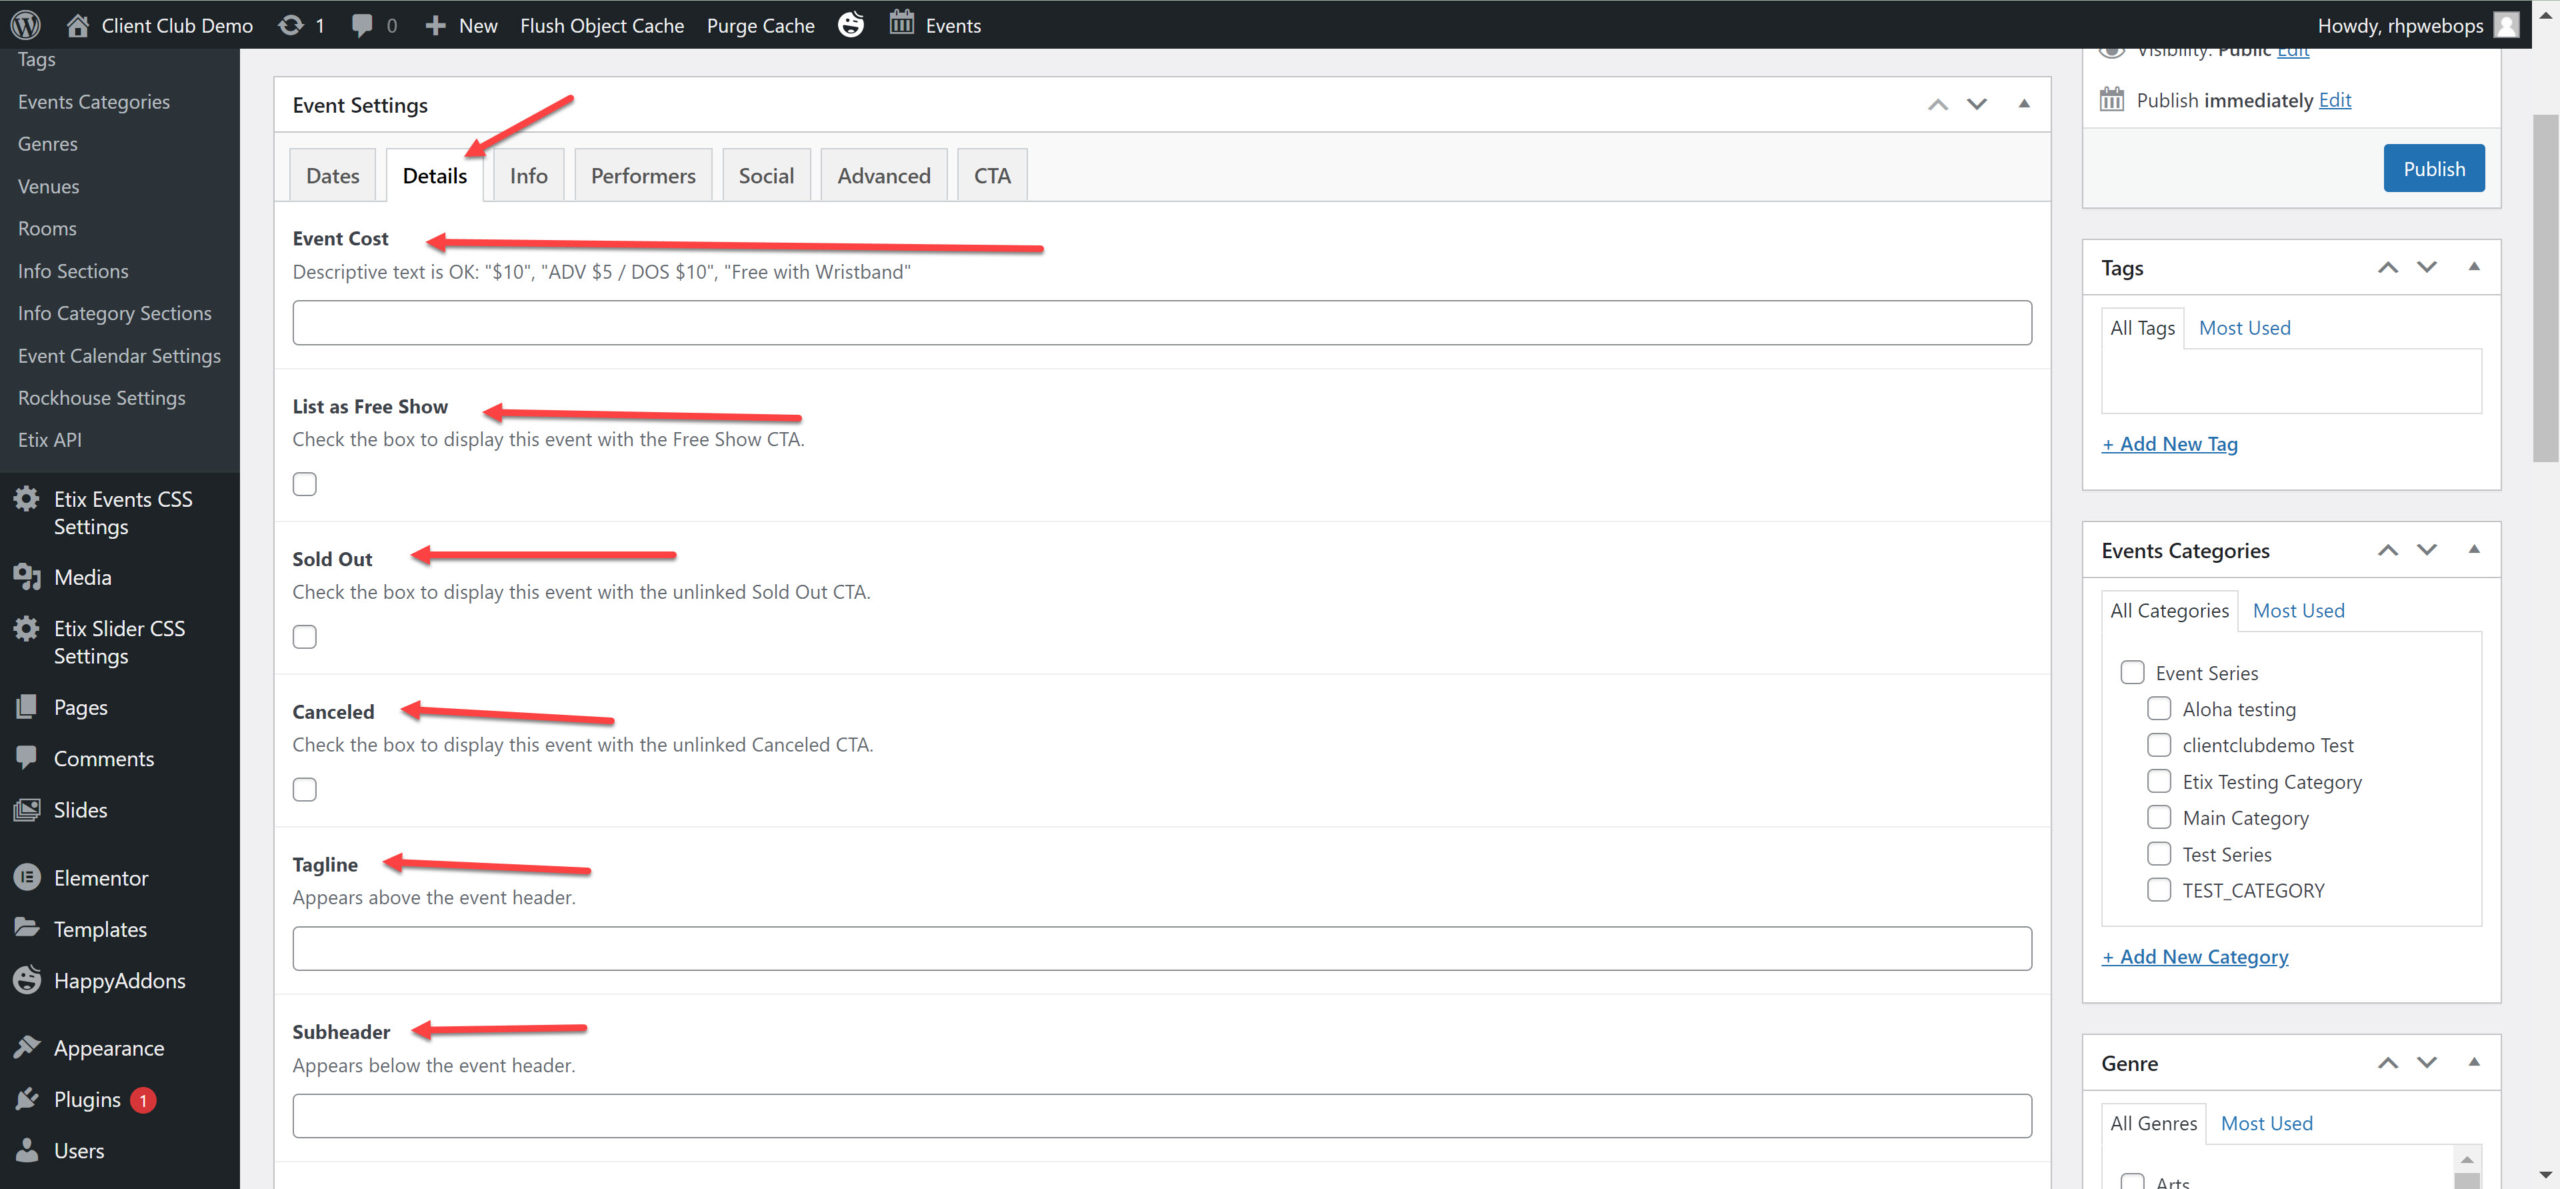
Step 3: Click on the Details tab. The other available tabs are:
Event Cost
List as Free Show
Sold Out
Canceled
Tagline
Subheader
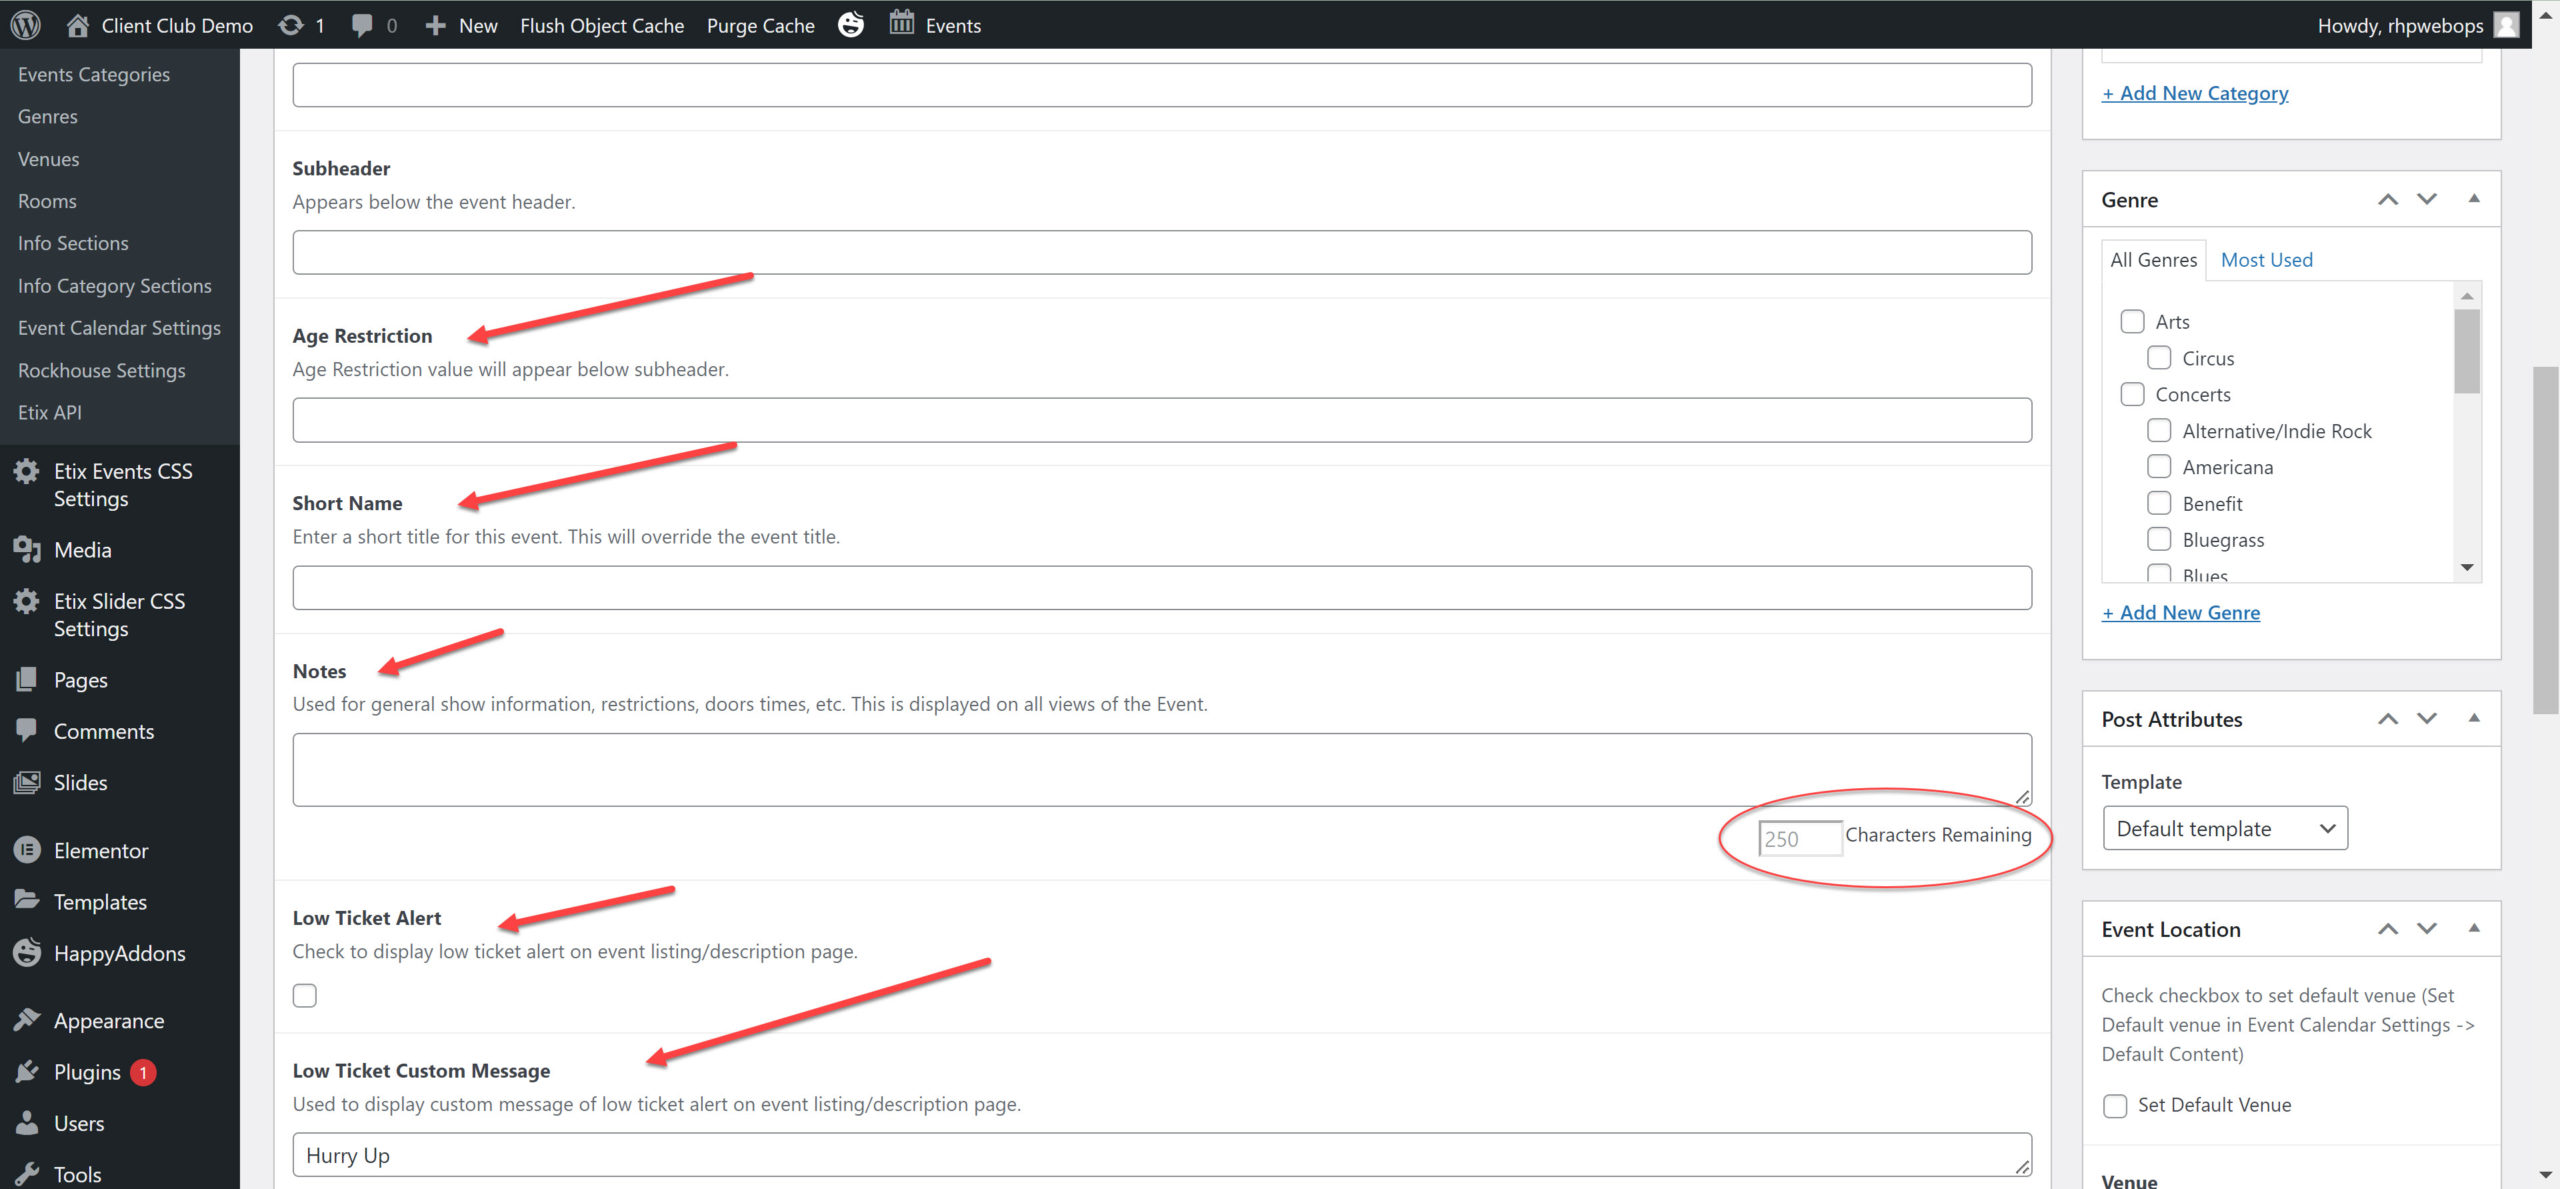
Age Restriction
Short Name
Notes – There is a 250 charachter limit.
Low Ticket Alert
Low Ticket Custom Message
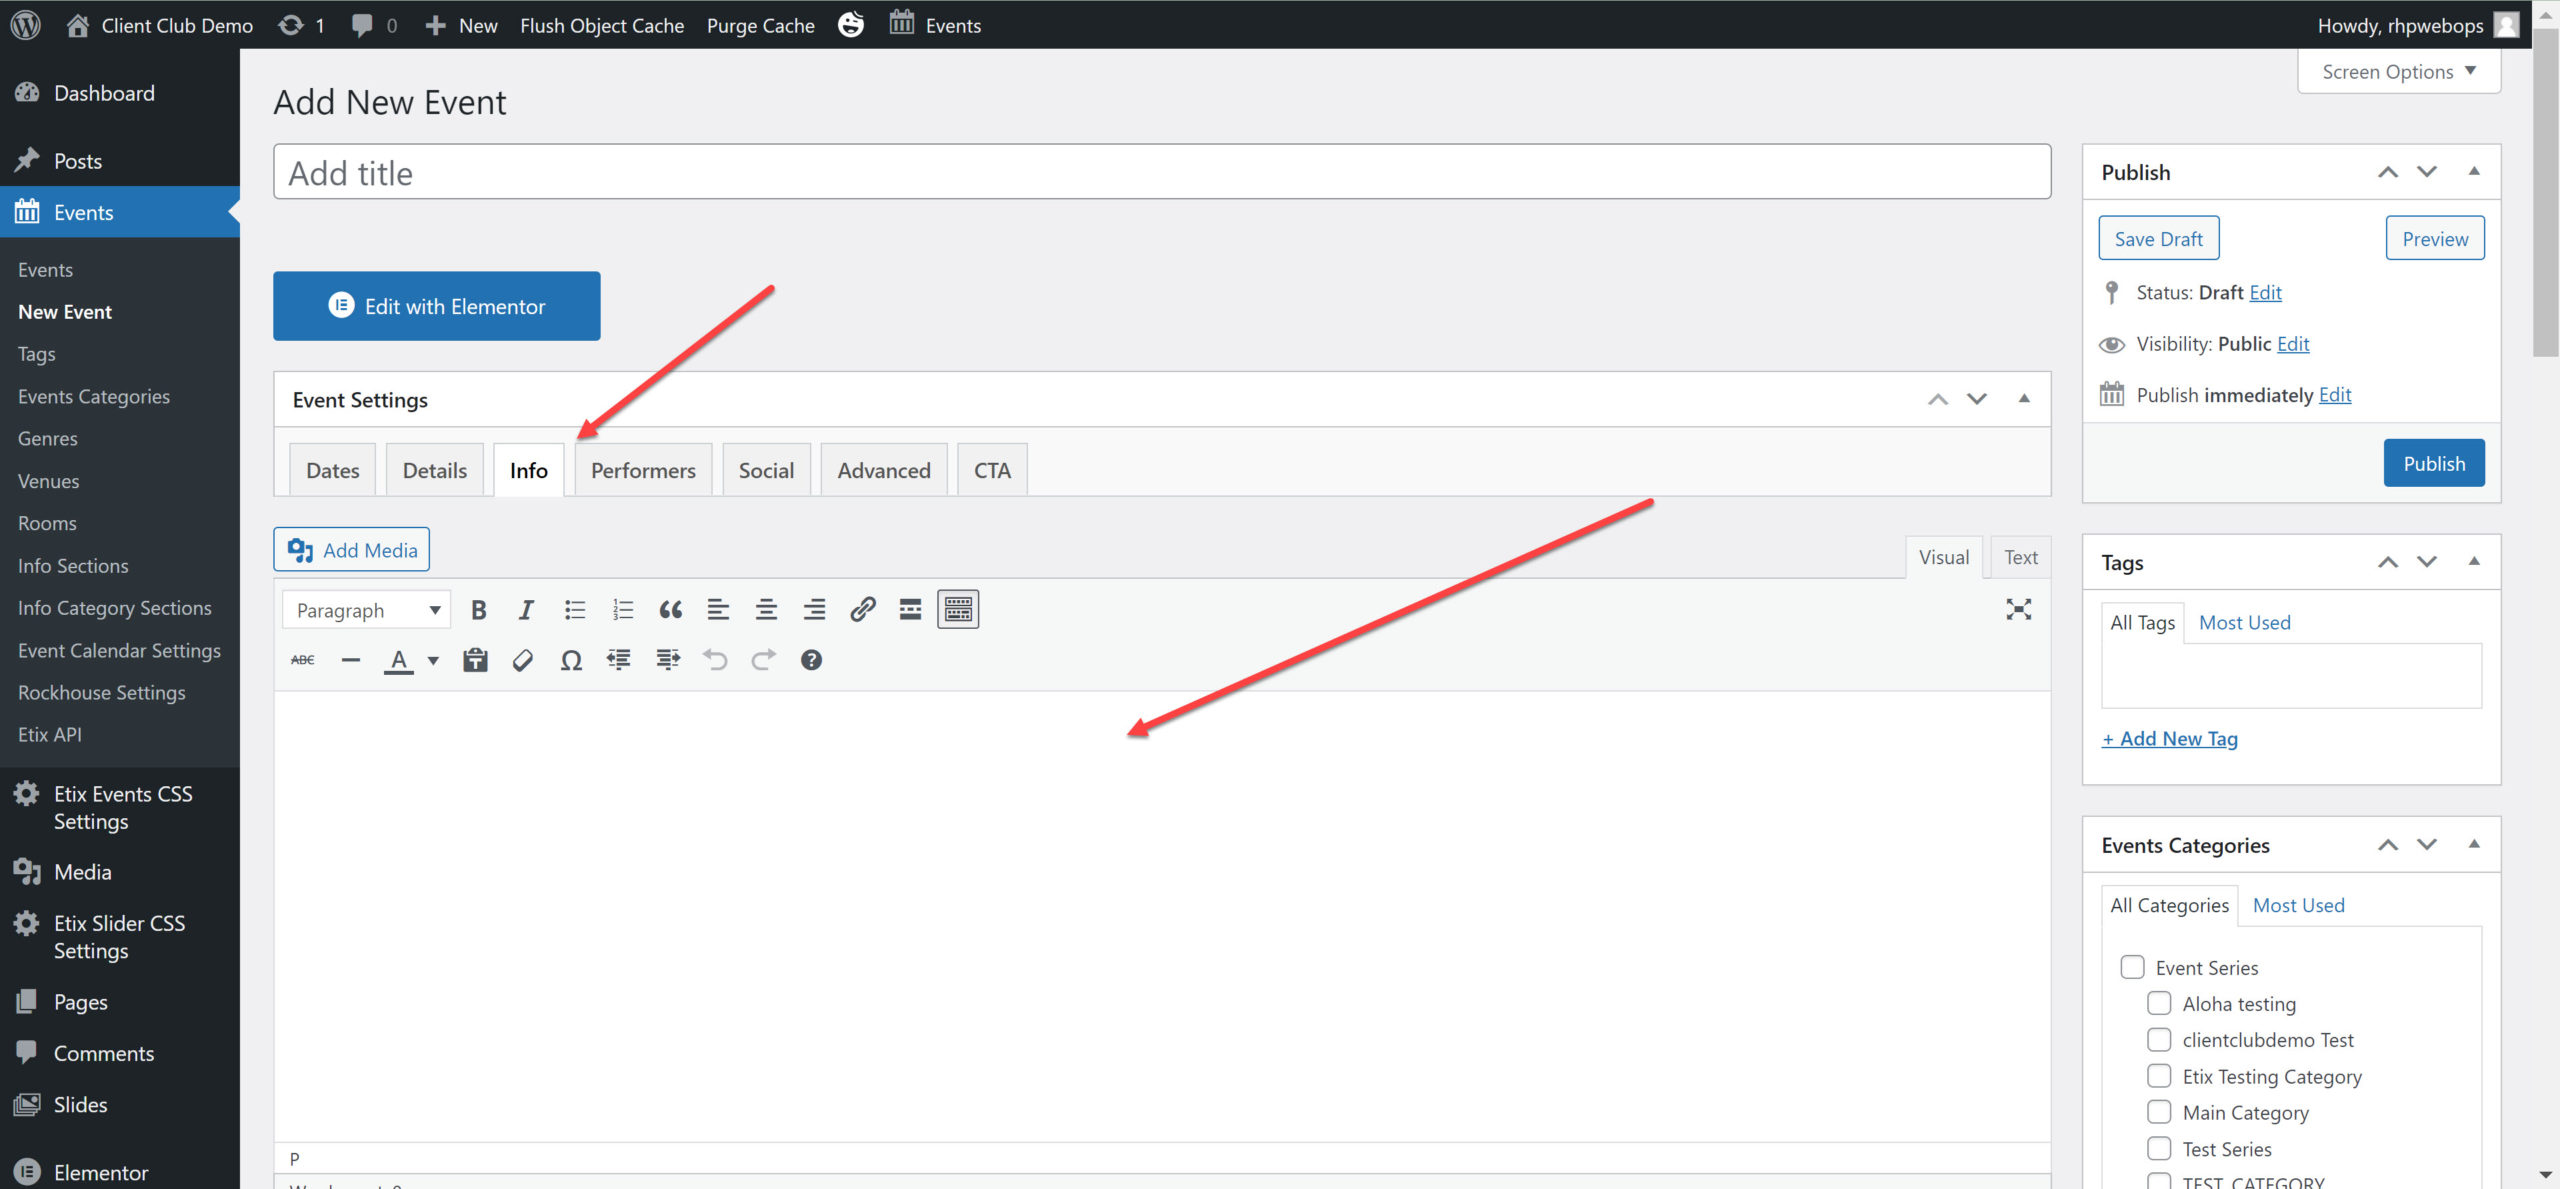
Step 4: Click on the Info tab.
This is where additional show information, artist background etc. will go.
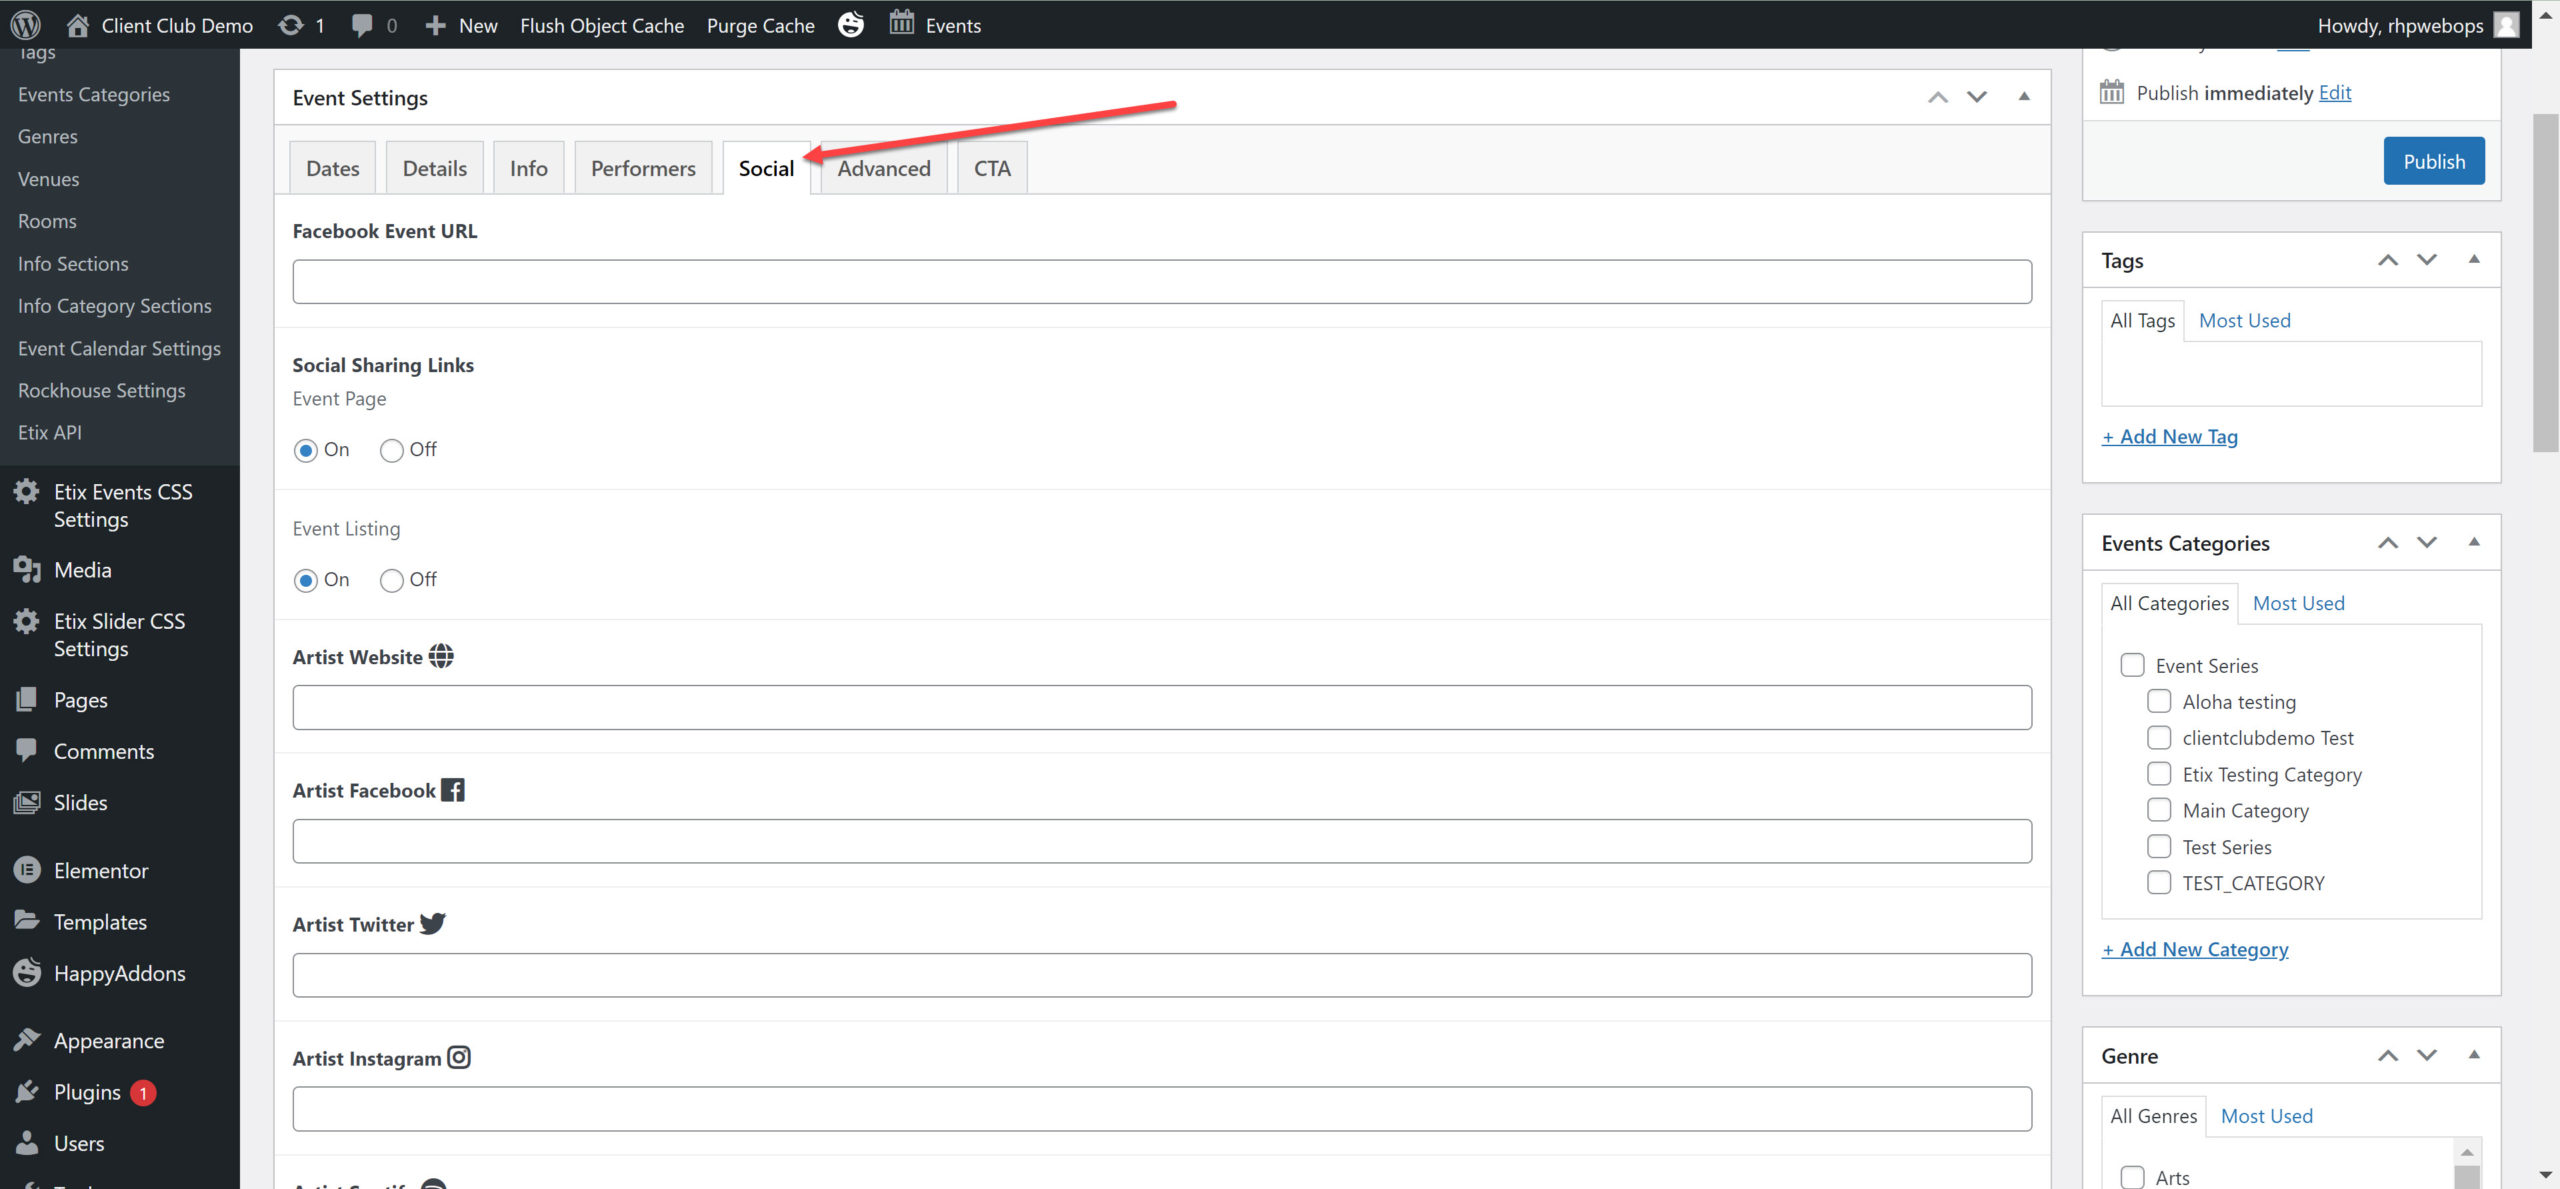
Step 5: Click on the Social tab.
This is where you will enter following URLs:
Facebook Event
Artist Website
Artist Facebook
Artist Twitter
Artist Instagram
Artist Spotify
Artist Apple Music
Artist Amazon Music
Artist SoundCloud
Artist Bandcamp
Artist YouTube
Artist Tumblr
Other Artist URL
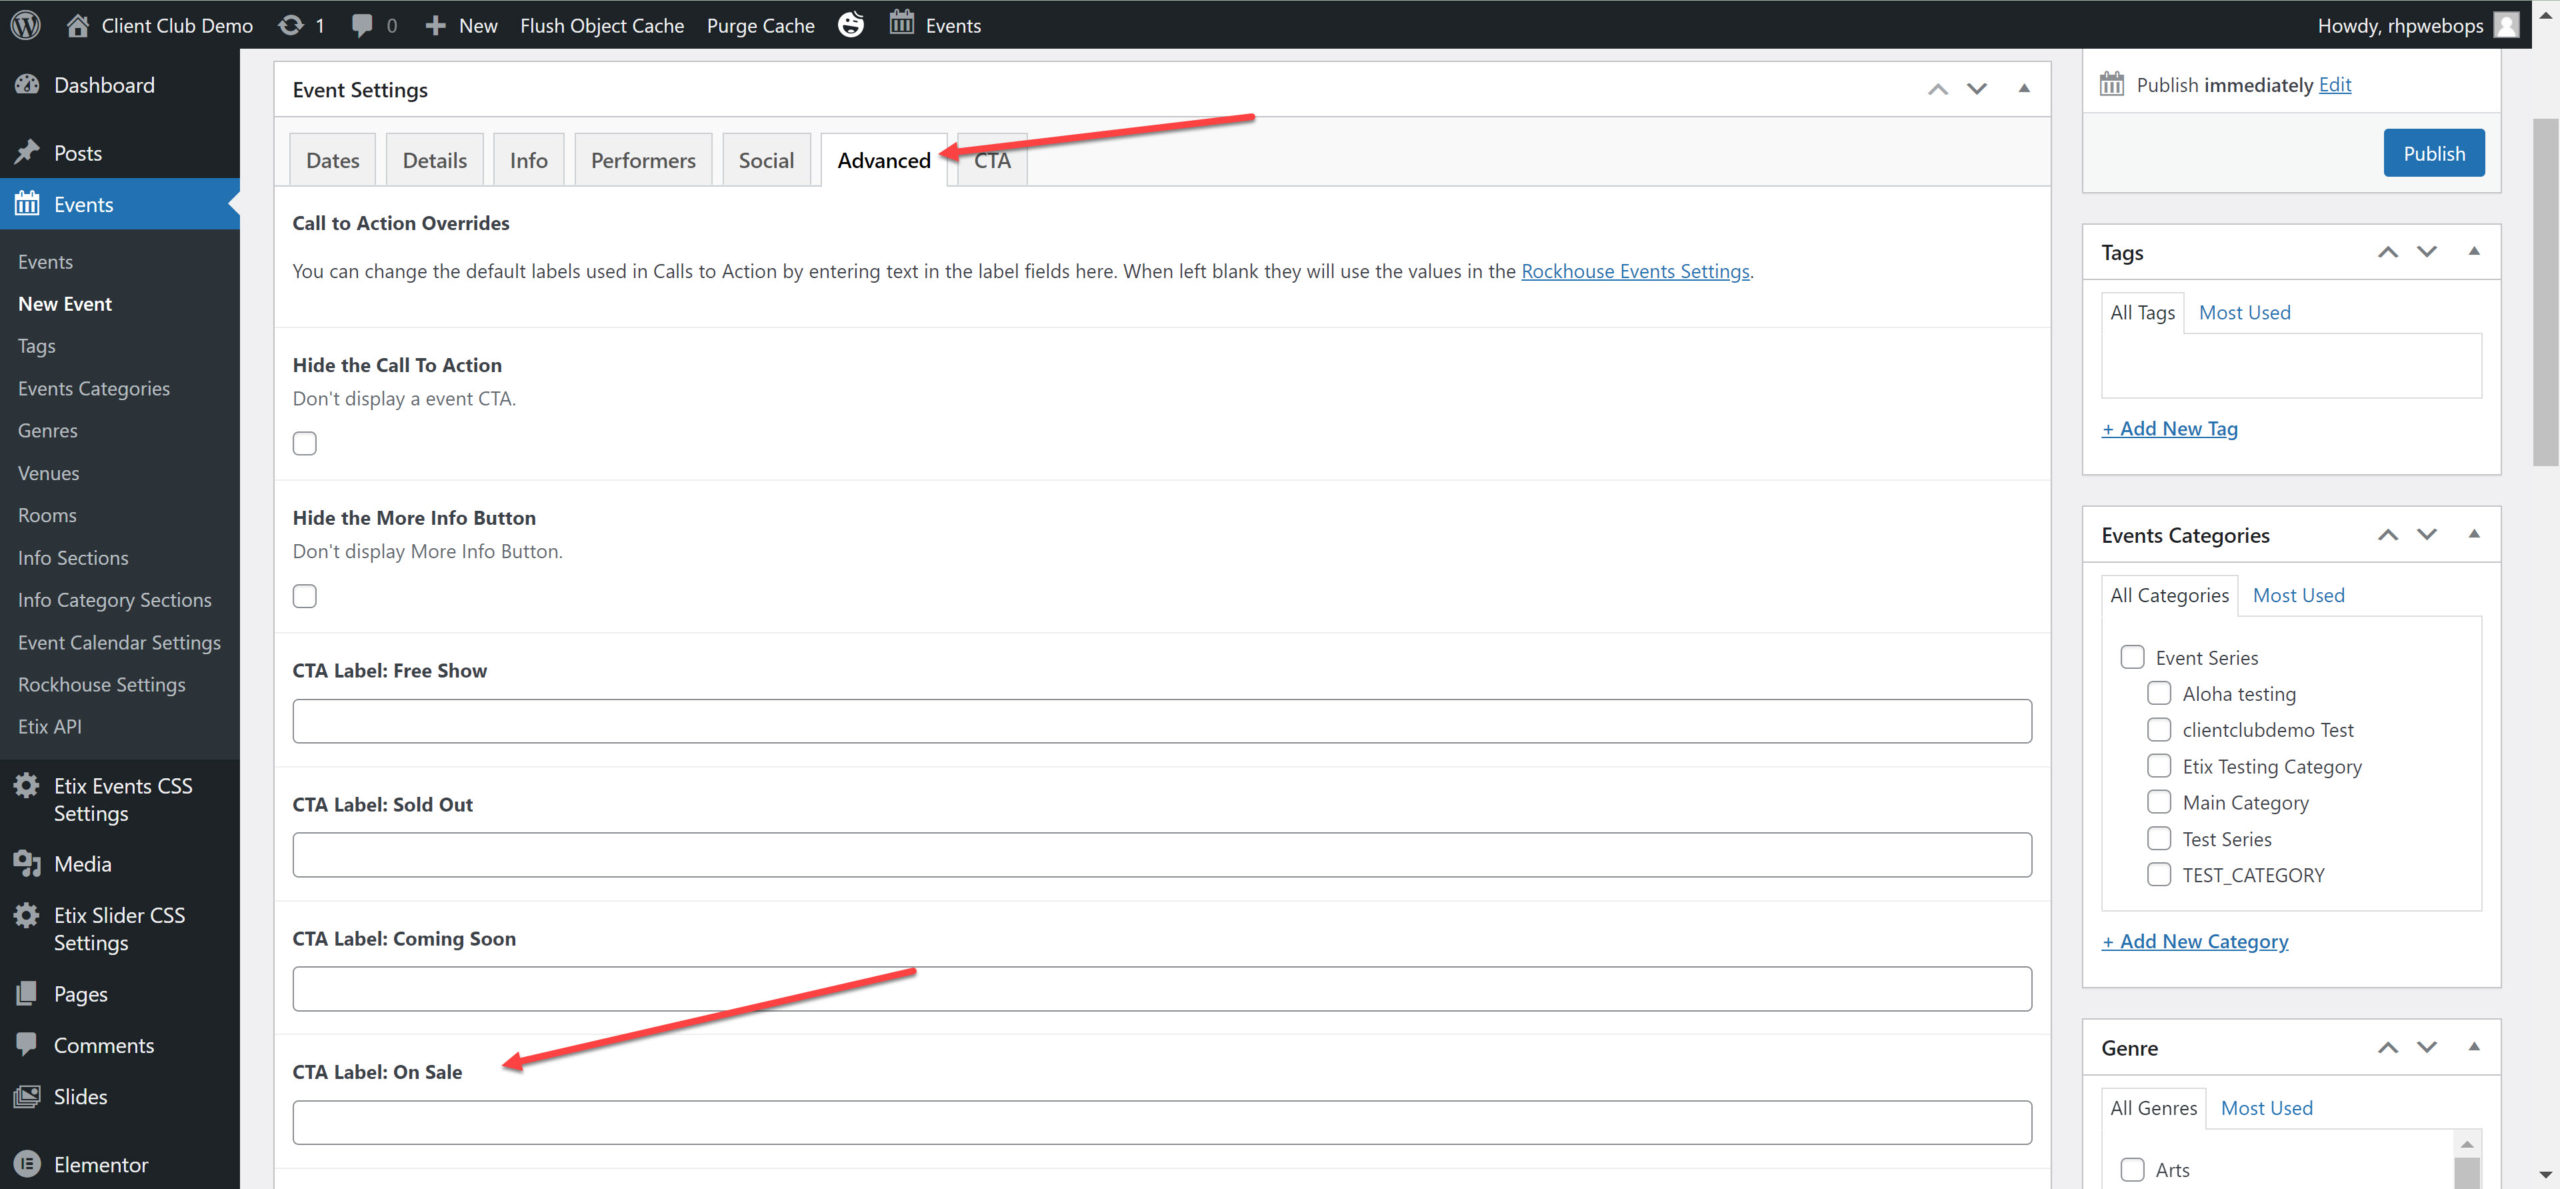
Step 6: Click on the Advanced tab.
This is where you can override CTAs (Call to Action). Any changes made here will apply to this event only.
If you wish to change the main all to action wording, type the new wording in CTA Label: On Sale.
Step 7: Click on the CTA tab.
This is where you place the link to purchase tickets, register, etc.
If you wish to change the main all to action wording, click on the advanced tab and type the new wording in CTA Label: On Sale.
A Second CTA can be added below.
Enter the Secondary CTA Button Text
Enter the Secondary CTA Link
Step 8: Update the information in the right-hand column.
The important fields to fill out are:
Genre
Event Location (Yours will start to populate as you type the name in)
Featured Image – This is where you’ll put the artist image/whatever image you want to show for the event.
Step 9: Preview and Save.
Click the Preview button to view the event and make sure everything looks as it should, that links are working properly, etc.